Registering developer, device, and application information in Riiiver
In order to log in to Riiiver from the sample app that a user just built, you need to register developer (yourself) information, (your) sample app information, and your device information in Riiiver.
You will be able to register the information from the Riiiver developer site. The information that must be registered in Riiiver is as follows:
- Developer information
- Email address – used as your Riiiver developer ID
- Company information – about the company to which the developer belongs
- Vendor name
- Address
- Email address
- Contact phone number
- Contact name
- Vendor description
- Vendor icon – an image file of Vendor icon, up to 100KB (270 x 136 px.) – used as an icon of Piece developer when a user creates an iiidea.
- Currency – currency used to pay SDK usage fee. (Fee is required to publish in the live environment. No fee is required for trial, test, and debug! For more information, please click here.)
- Device information – about the device to be connected via an application using RiiiverSDK. (If you only have an application and no IoT device to connect to the application, please register the application as a device, as the application itself will be treated as a logical device.)
- Device name
- Device description
- Device icon image file (88 x 88 px. png format) – used in the UI to display Piece by device, etc.
As shown in the next chapter, proceed to actually register the necessary information in Riiiver. This chapter consists of the following sections.

Register developer information
Follow the steps on the Registering as a Developer page to register as a Riiiver developer.
After completing the registration process, check to see if you can log in to the developer site. Once you can successfully log in, proceed to register your company information.
Register company information
The next step is to register the organization to which the developer belongs. This information is also called Vendor information in Riiiver.
Even if you are an individual, you need to register company information in order to release a Piece. This is because it allows an iiidea creator to check, when selecting your Piece, such information as which company it was released by. Please follow the steps below to register company information.
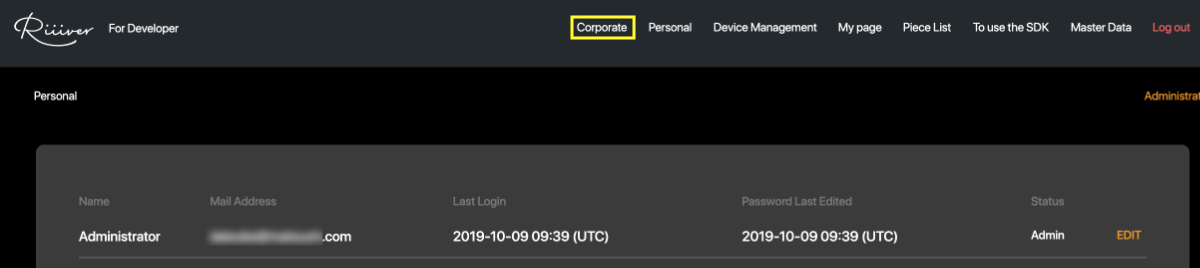
- After logging in to the developer site, click on "Corporate Account Management" and enter the required information.
- Enter the required information. Please note that the Vendor Name and the Vendor Icon information will be referenced by end users when you publish a Piece.
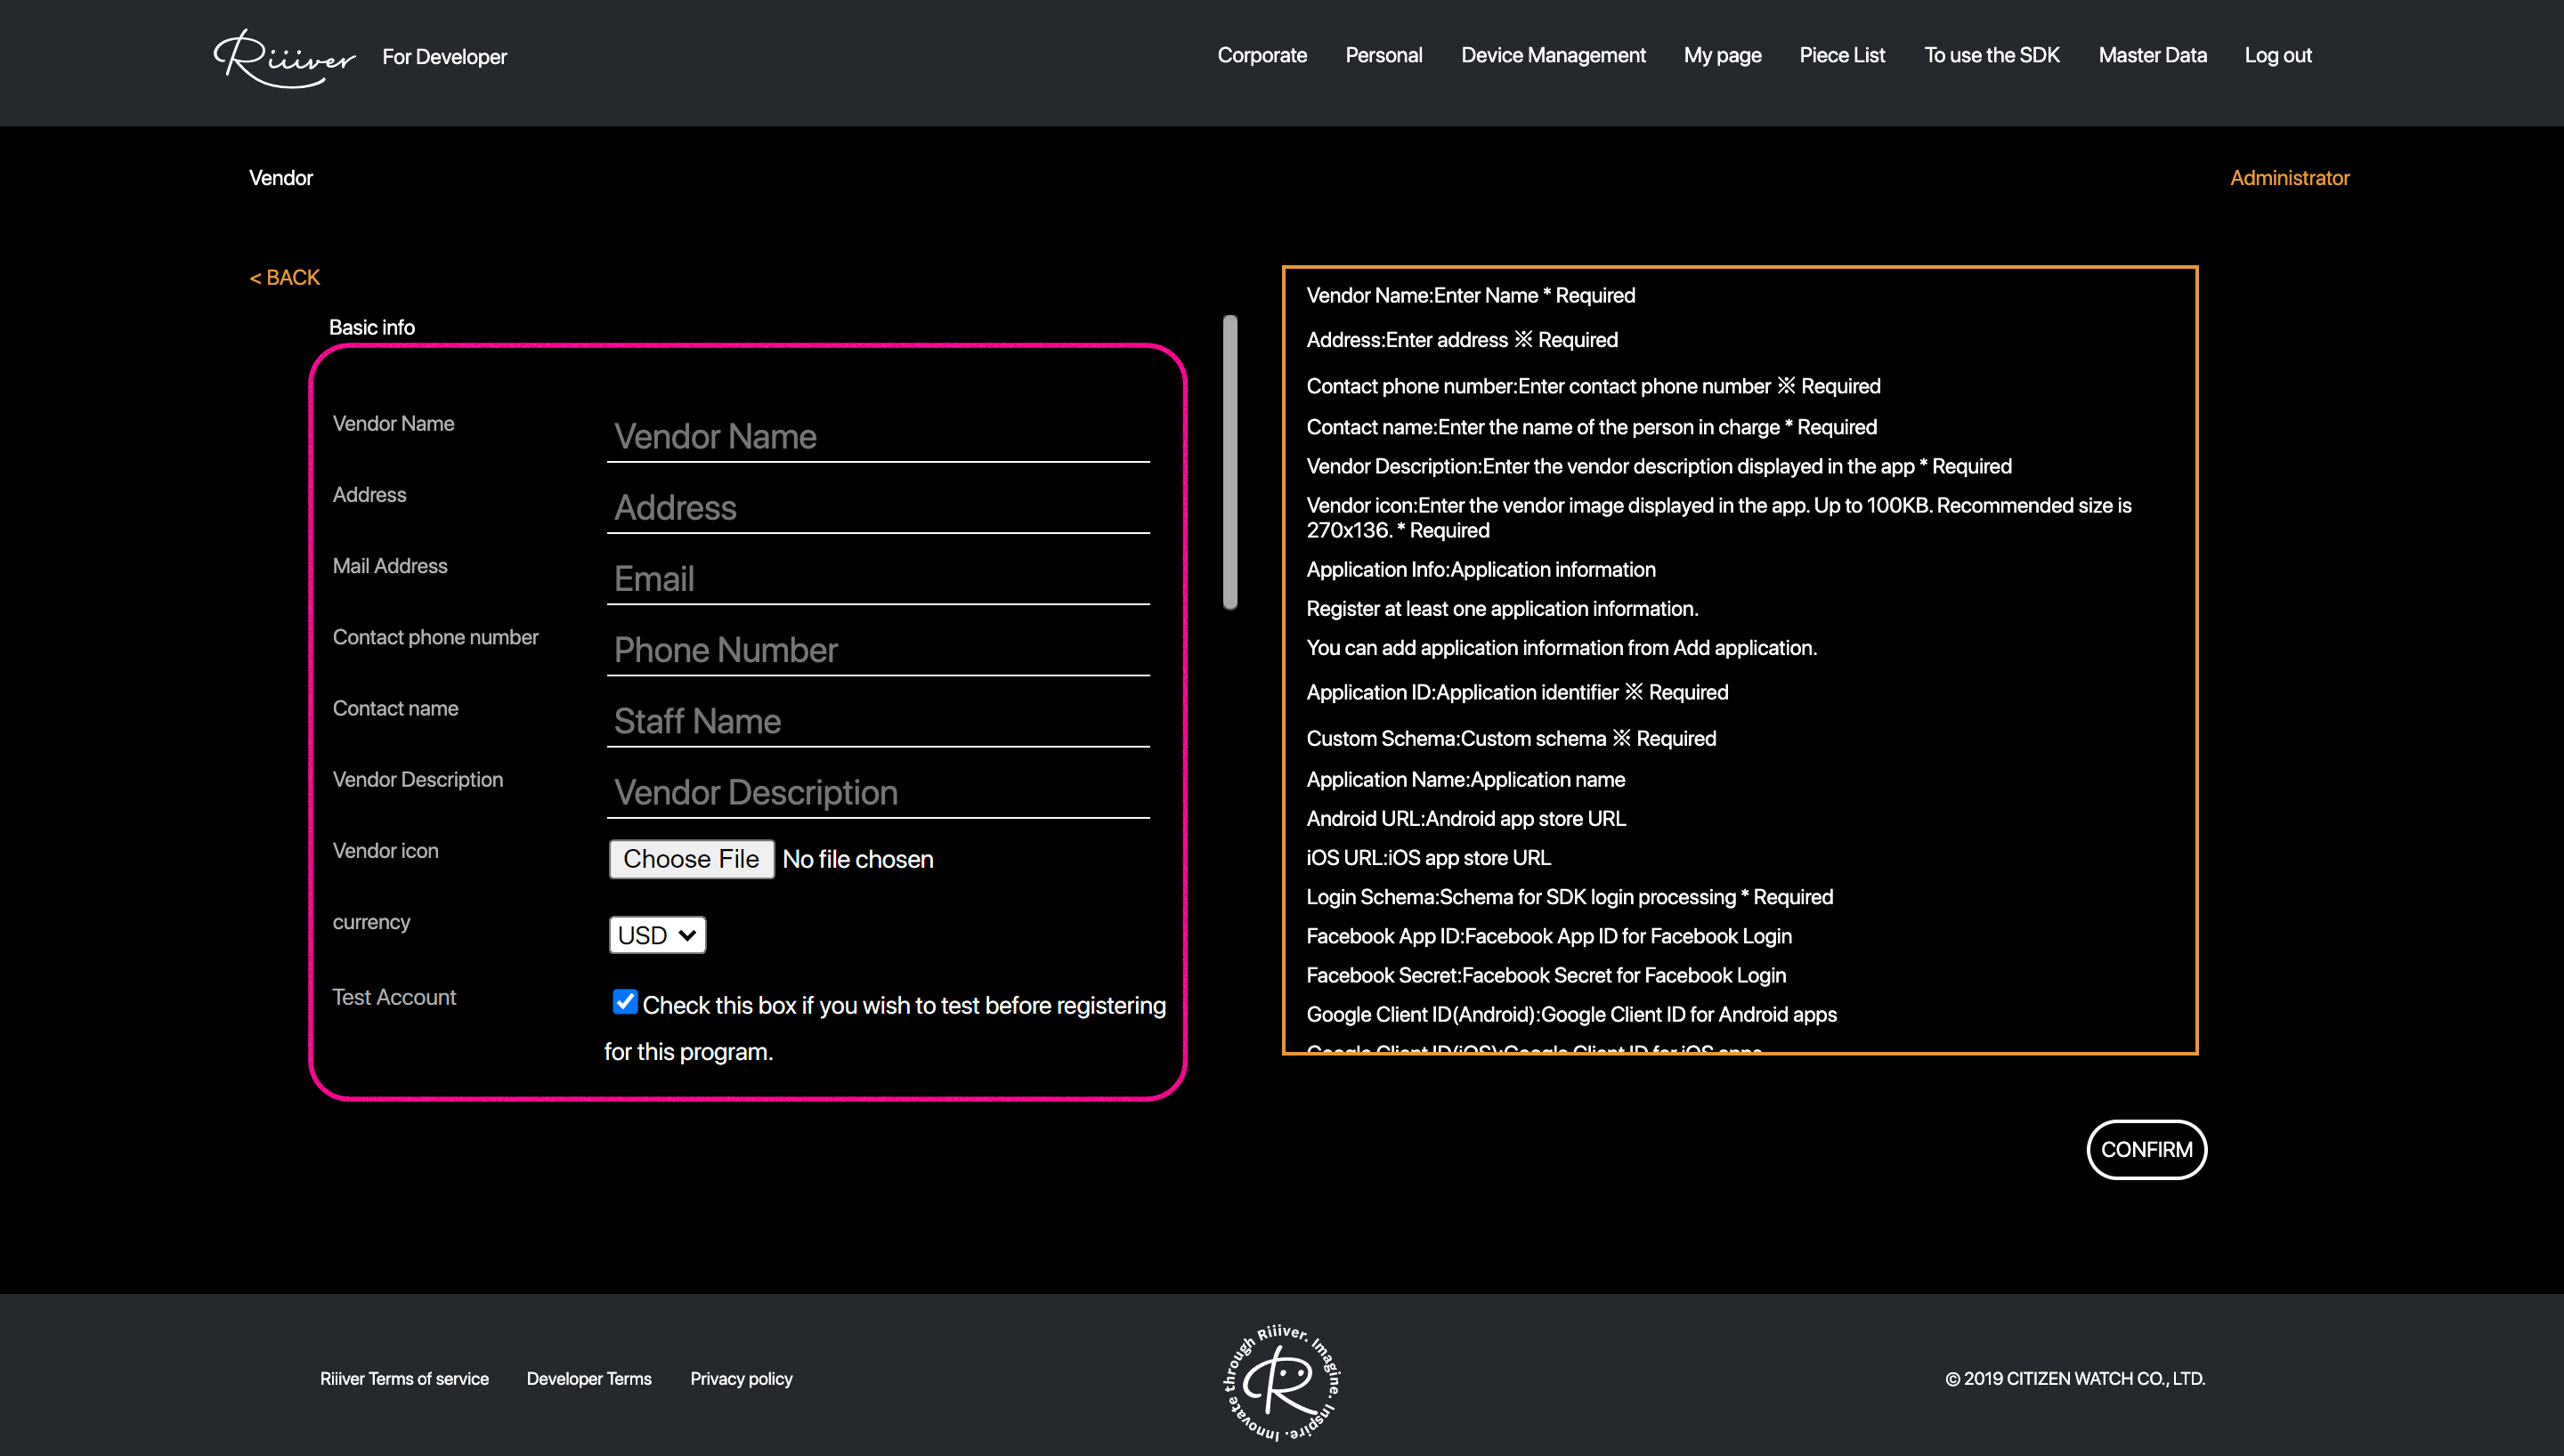
At this time, please make sure that the checkbox for test use is turned on. By checking the checkbox, your registered information will not be made public until your Piece is published.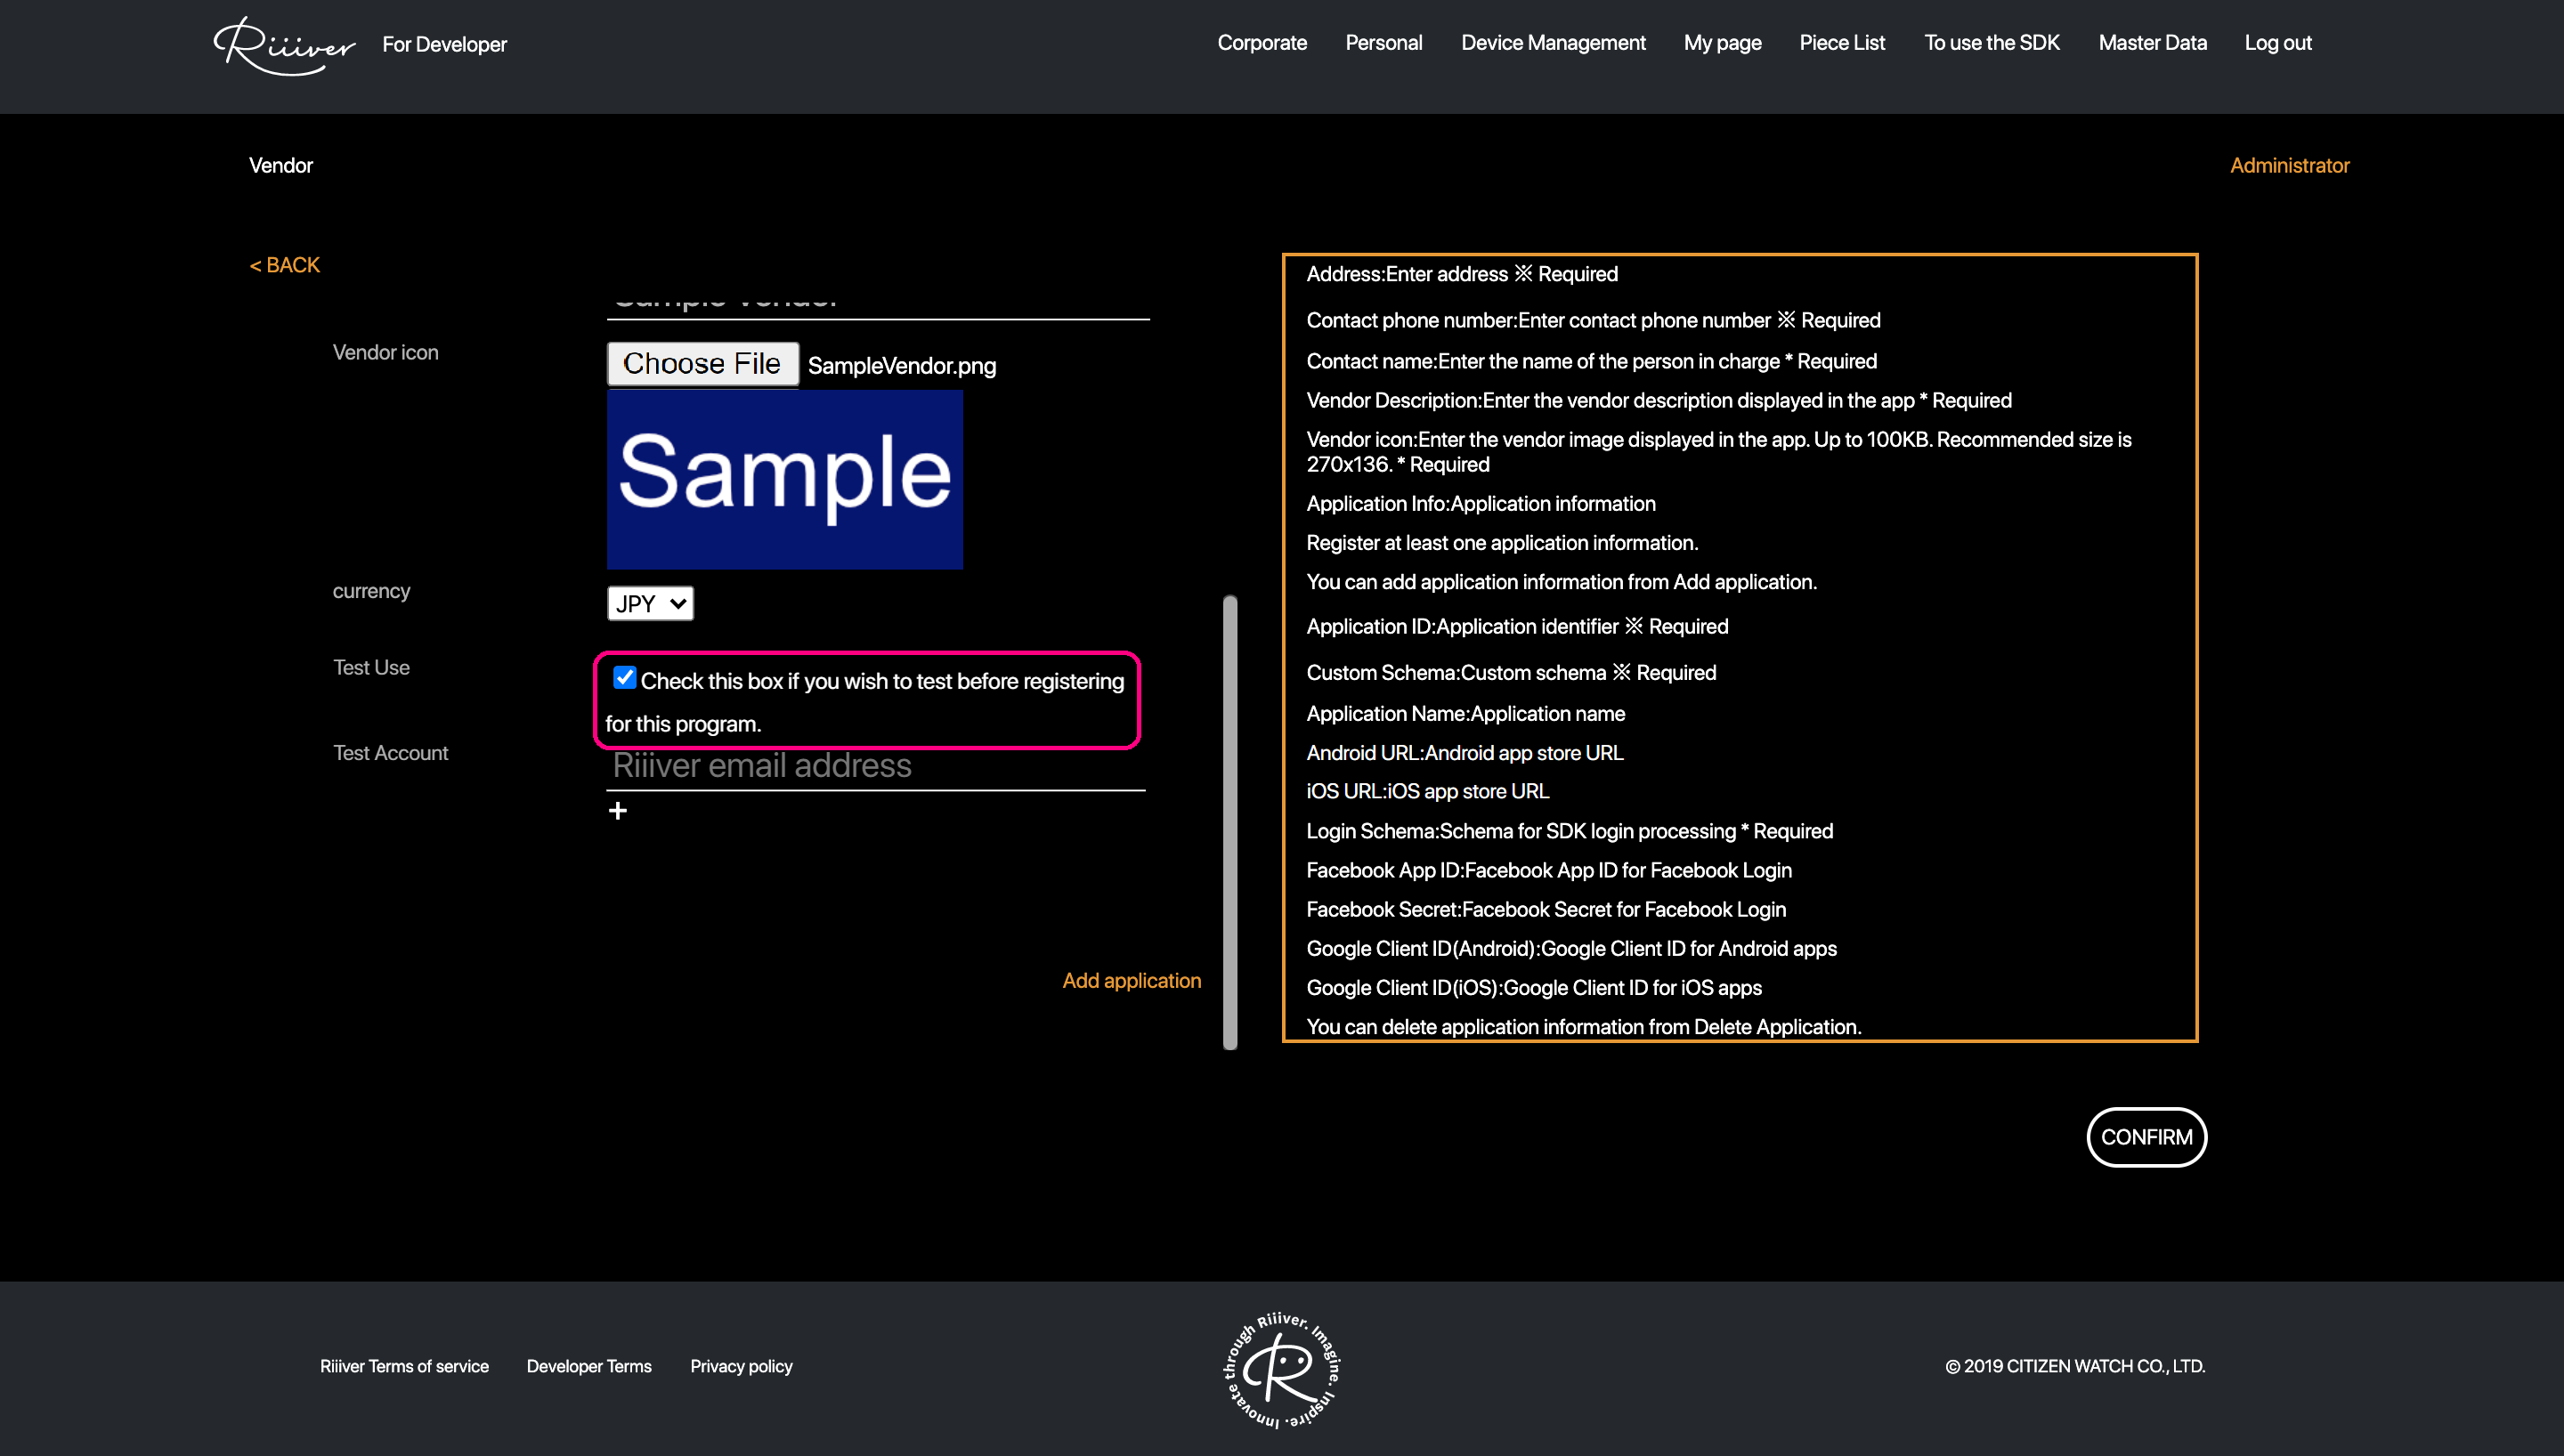 Also, you must register at least one application. Click on "Add application" and enter your application information.
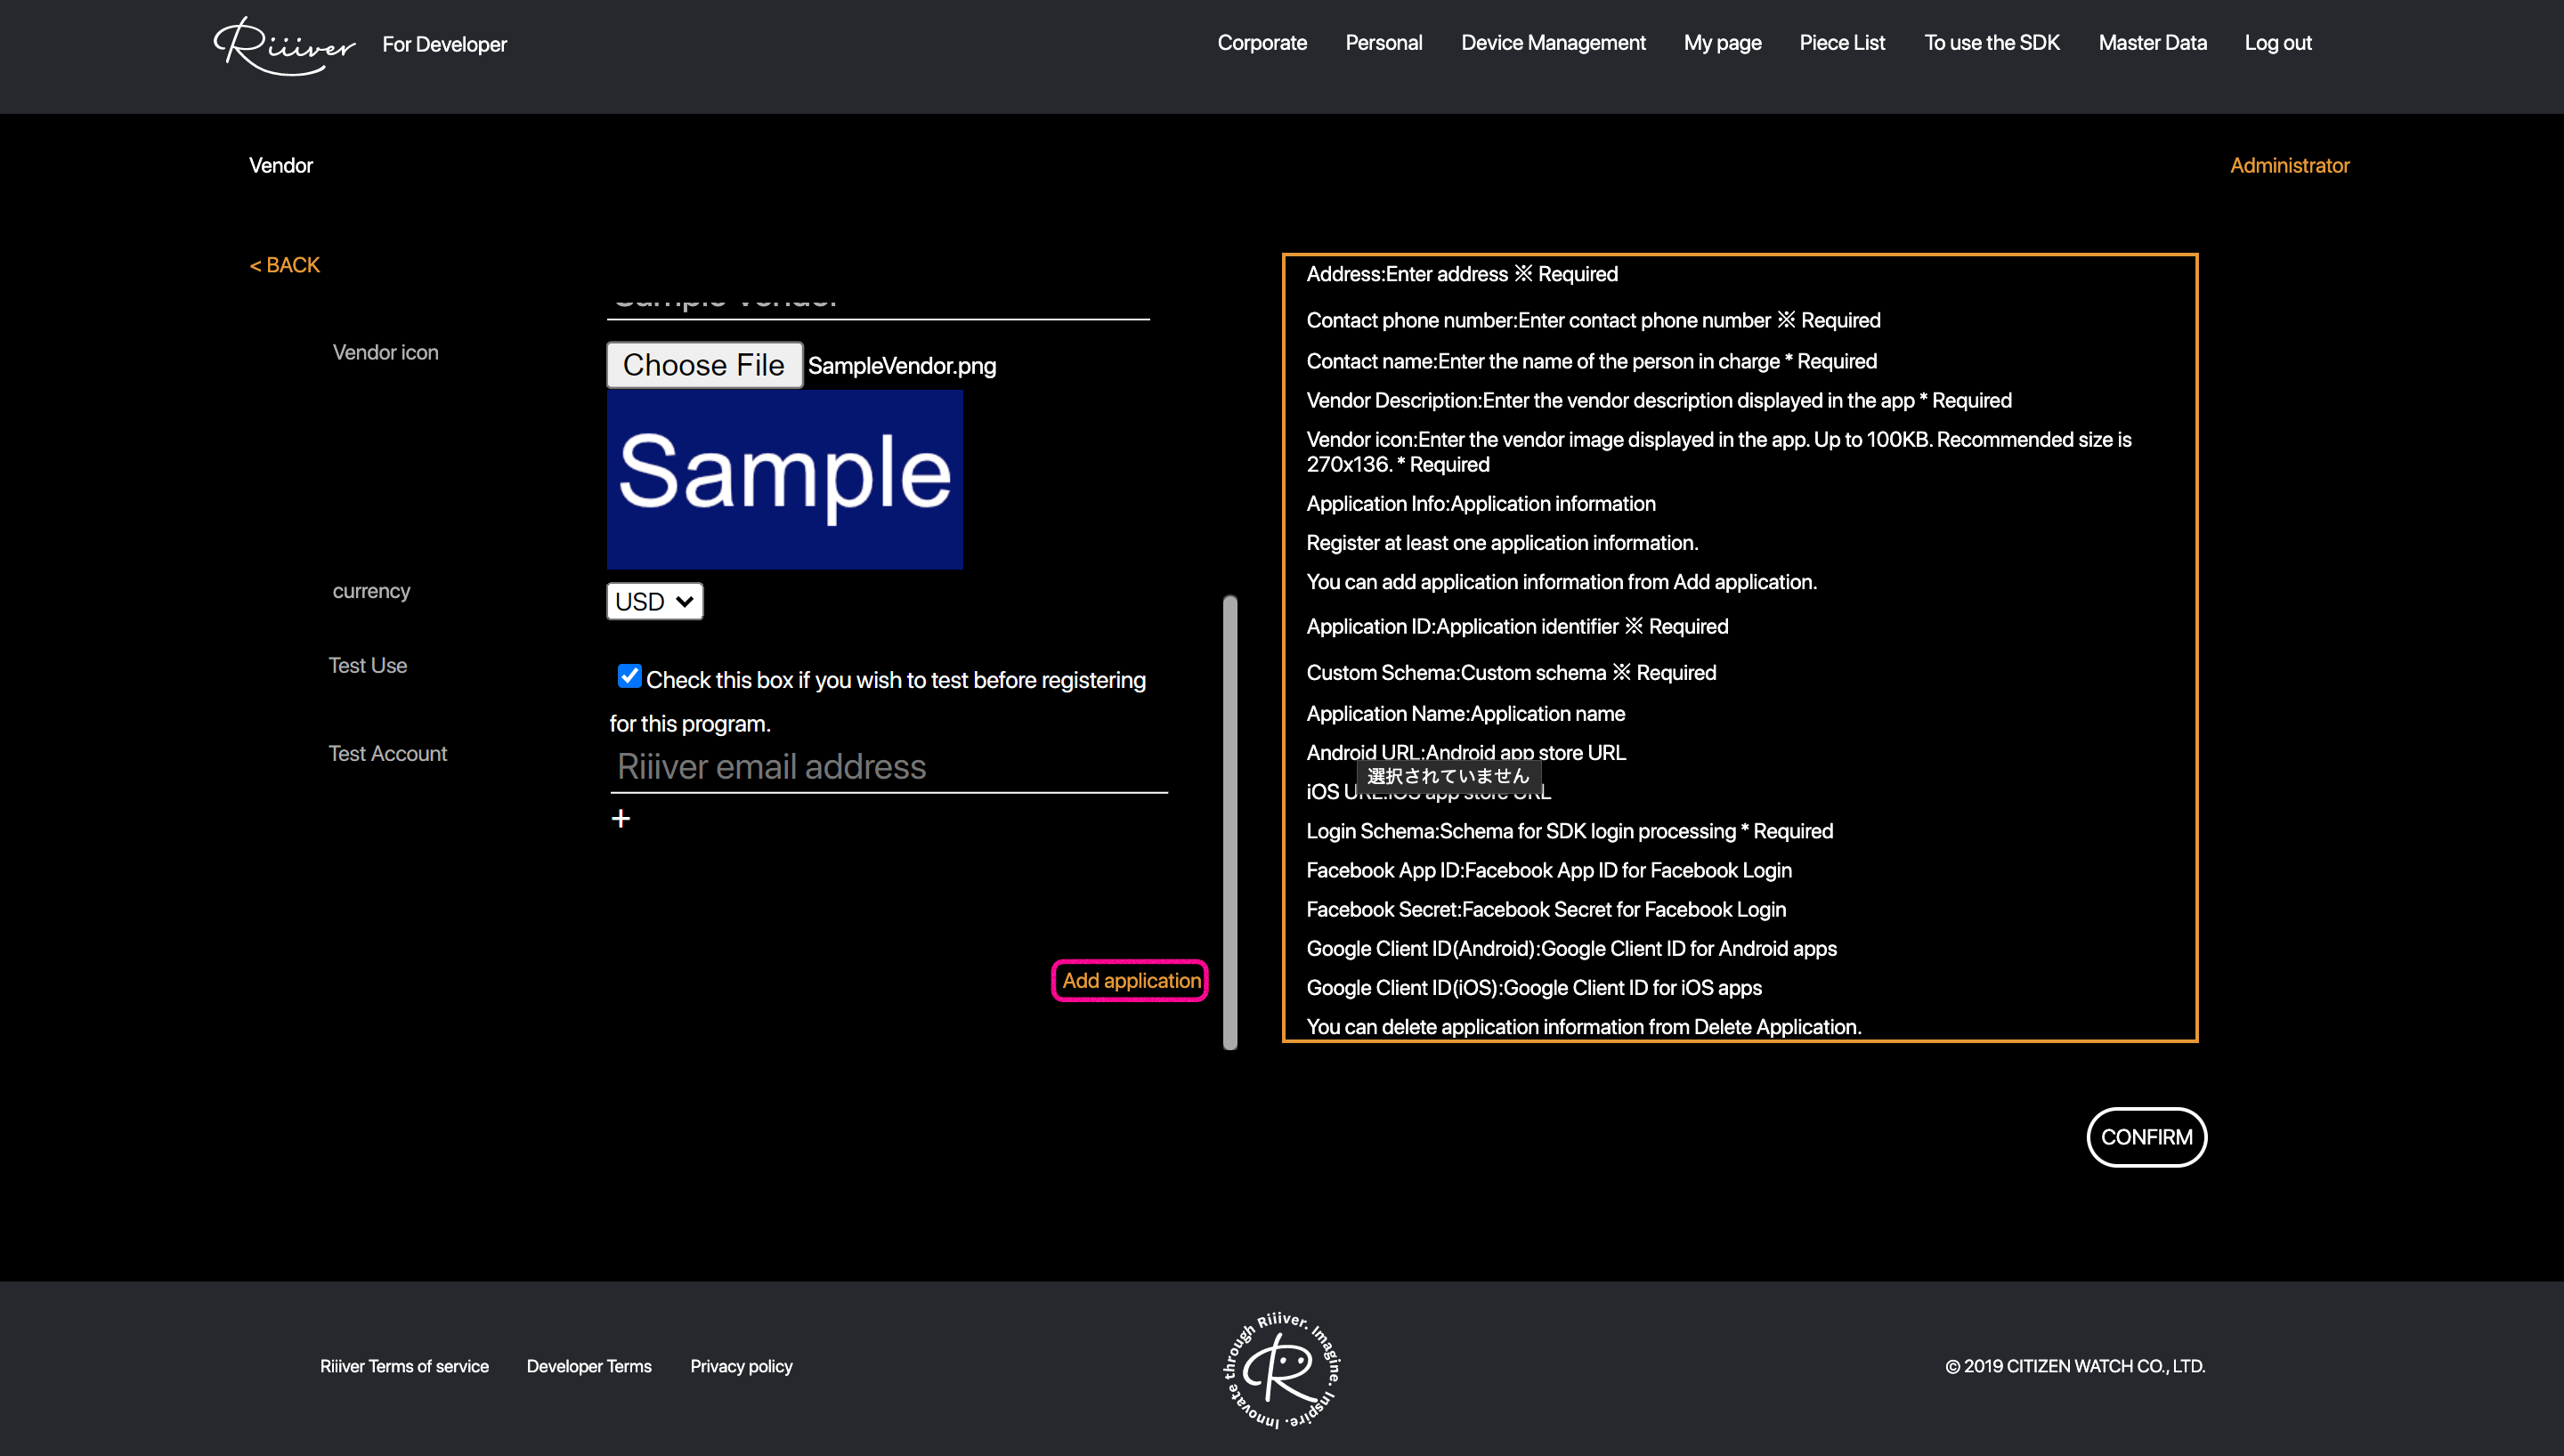
Enter your application information. The application information refers to the iOS/Android application that you will develop using RiiiverSDK. As it is intended to run just a sample app here, please enter only the required fields for the sample app.
following the below figure.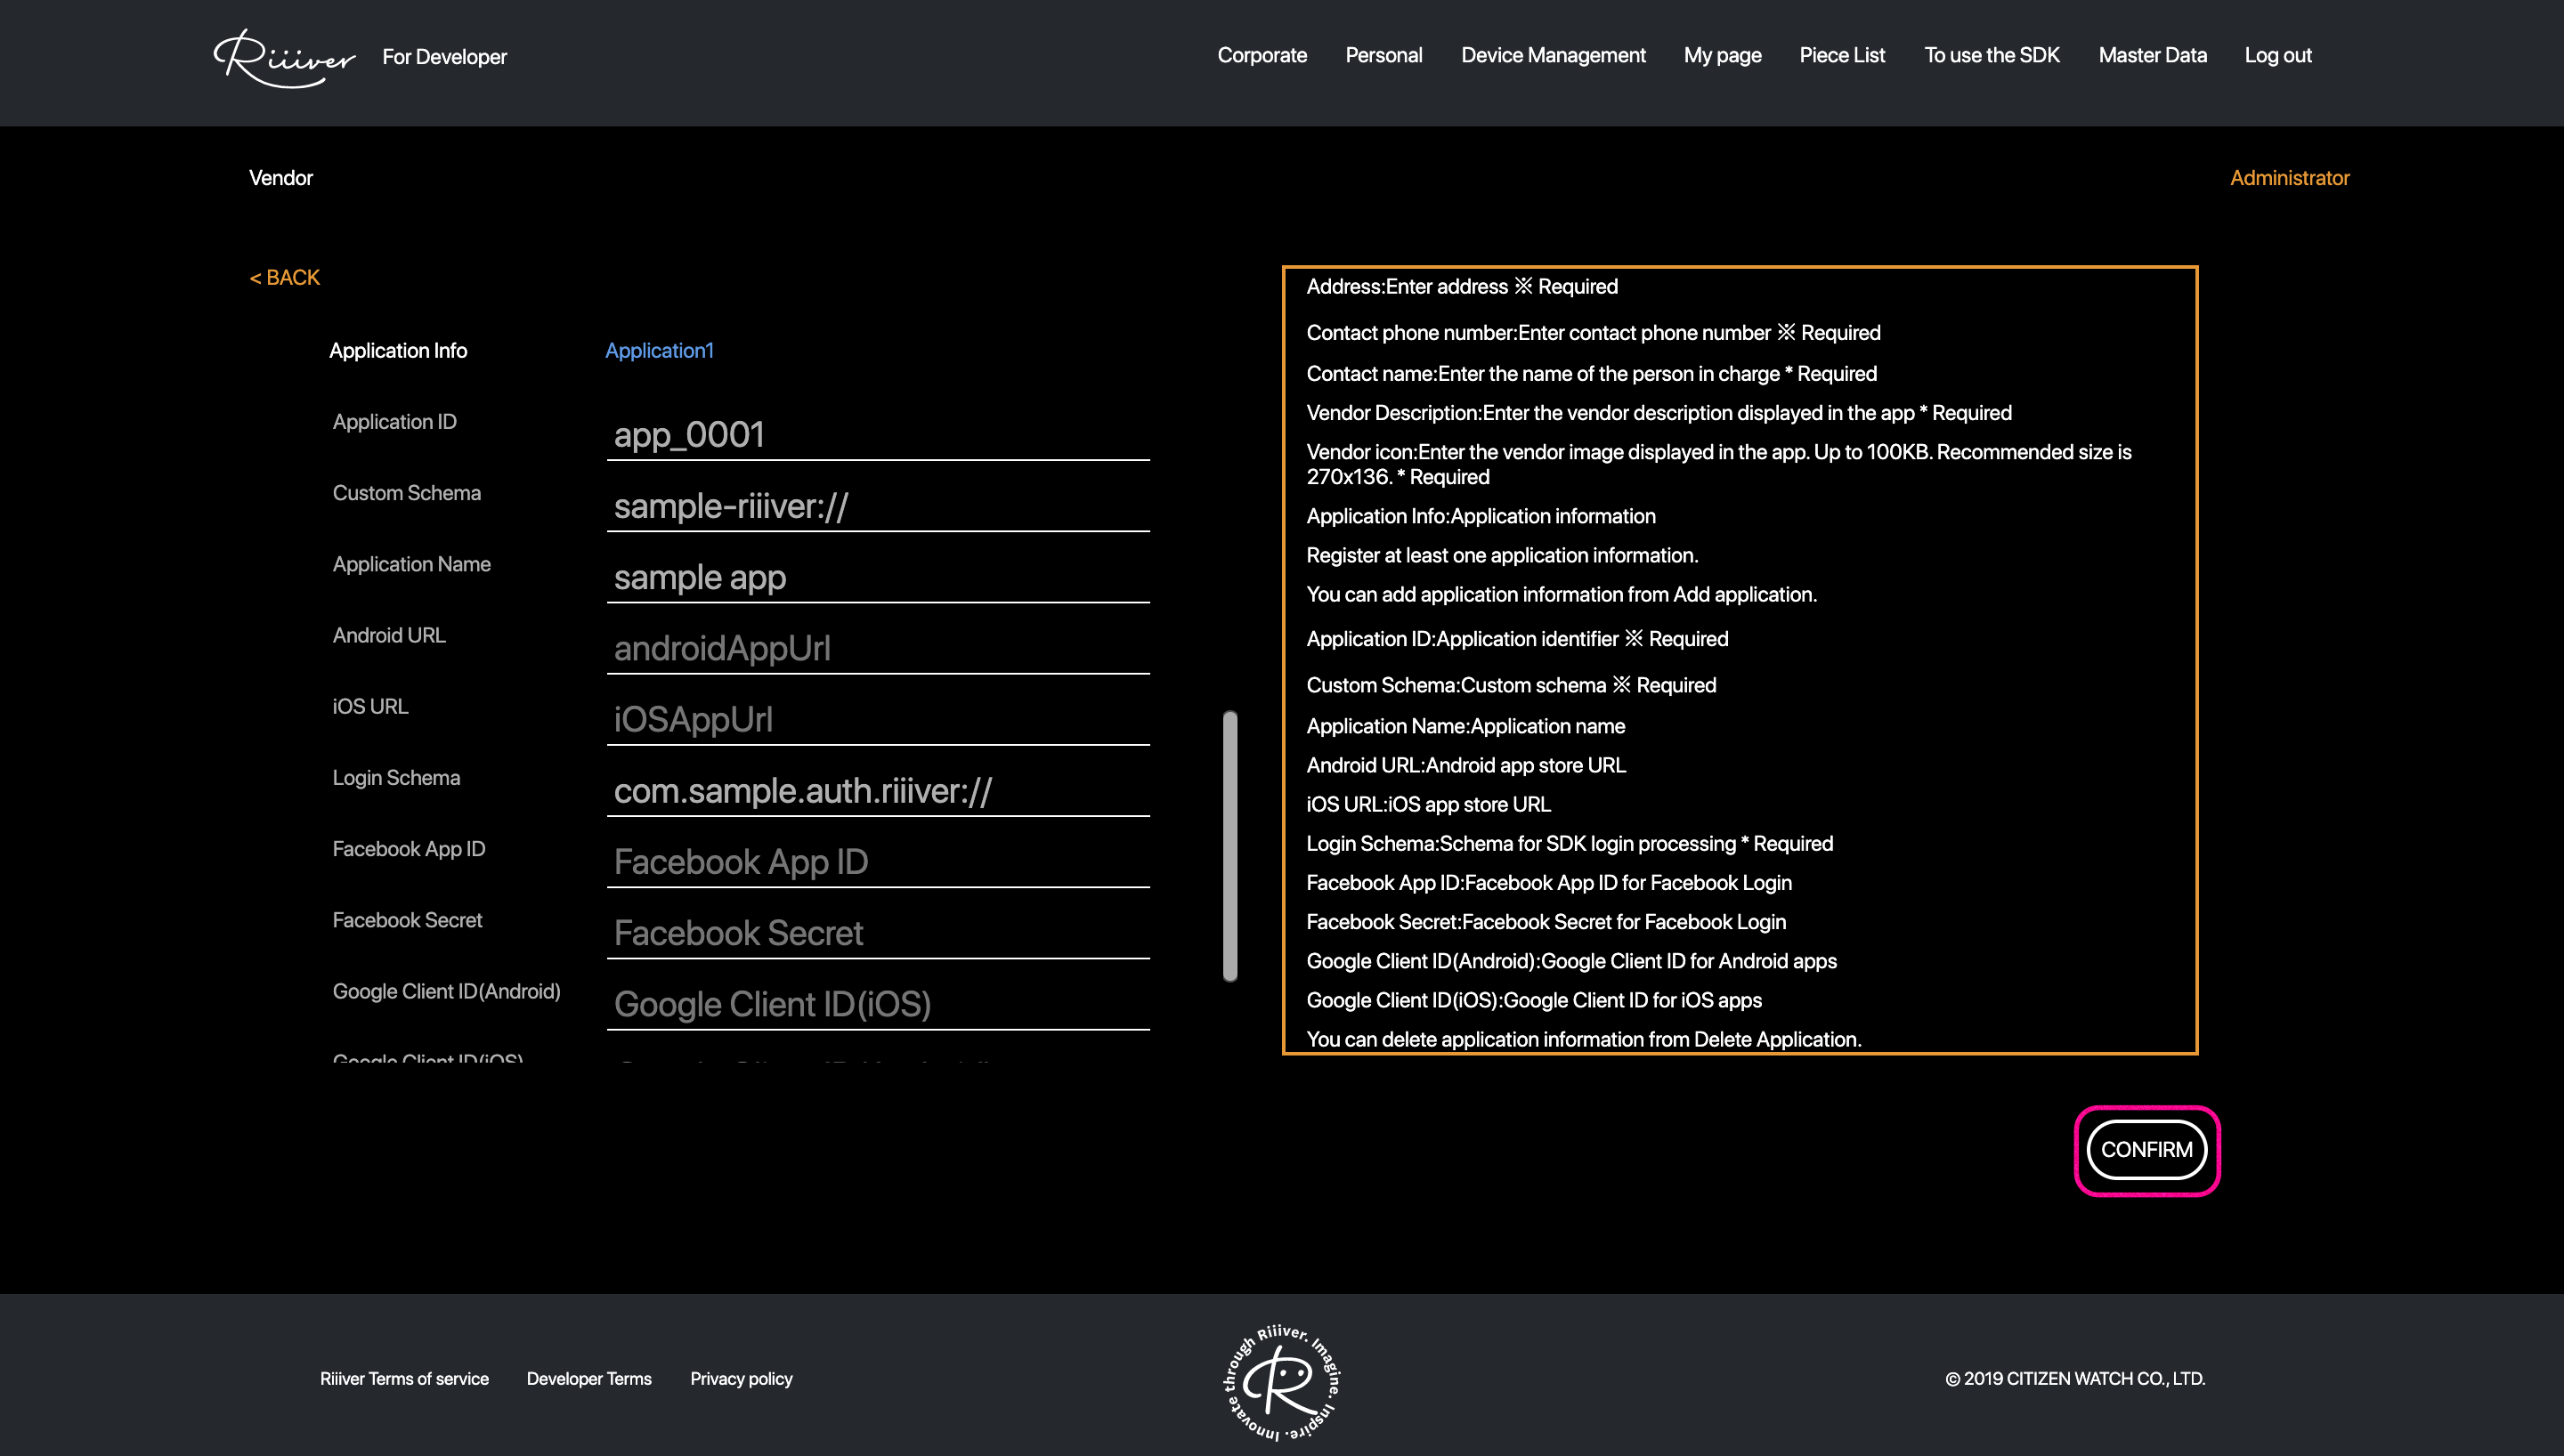
Application ID, Custom Scheme, Application Name, Login Scheme are required fields and must be entered. The other fields will be explained in a separate manual to help you use RiiiverSDK in your actual application.Custom Scheme and Login Scheme should be a unique string, such as a reverse domain. They need to be unique worldwide. At this time, please enter something like “com.example.app.mysample.custom://” and “com.example.app.mysample.login://”.
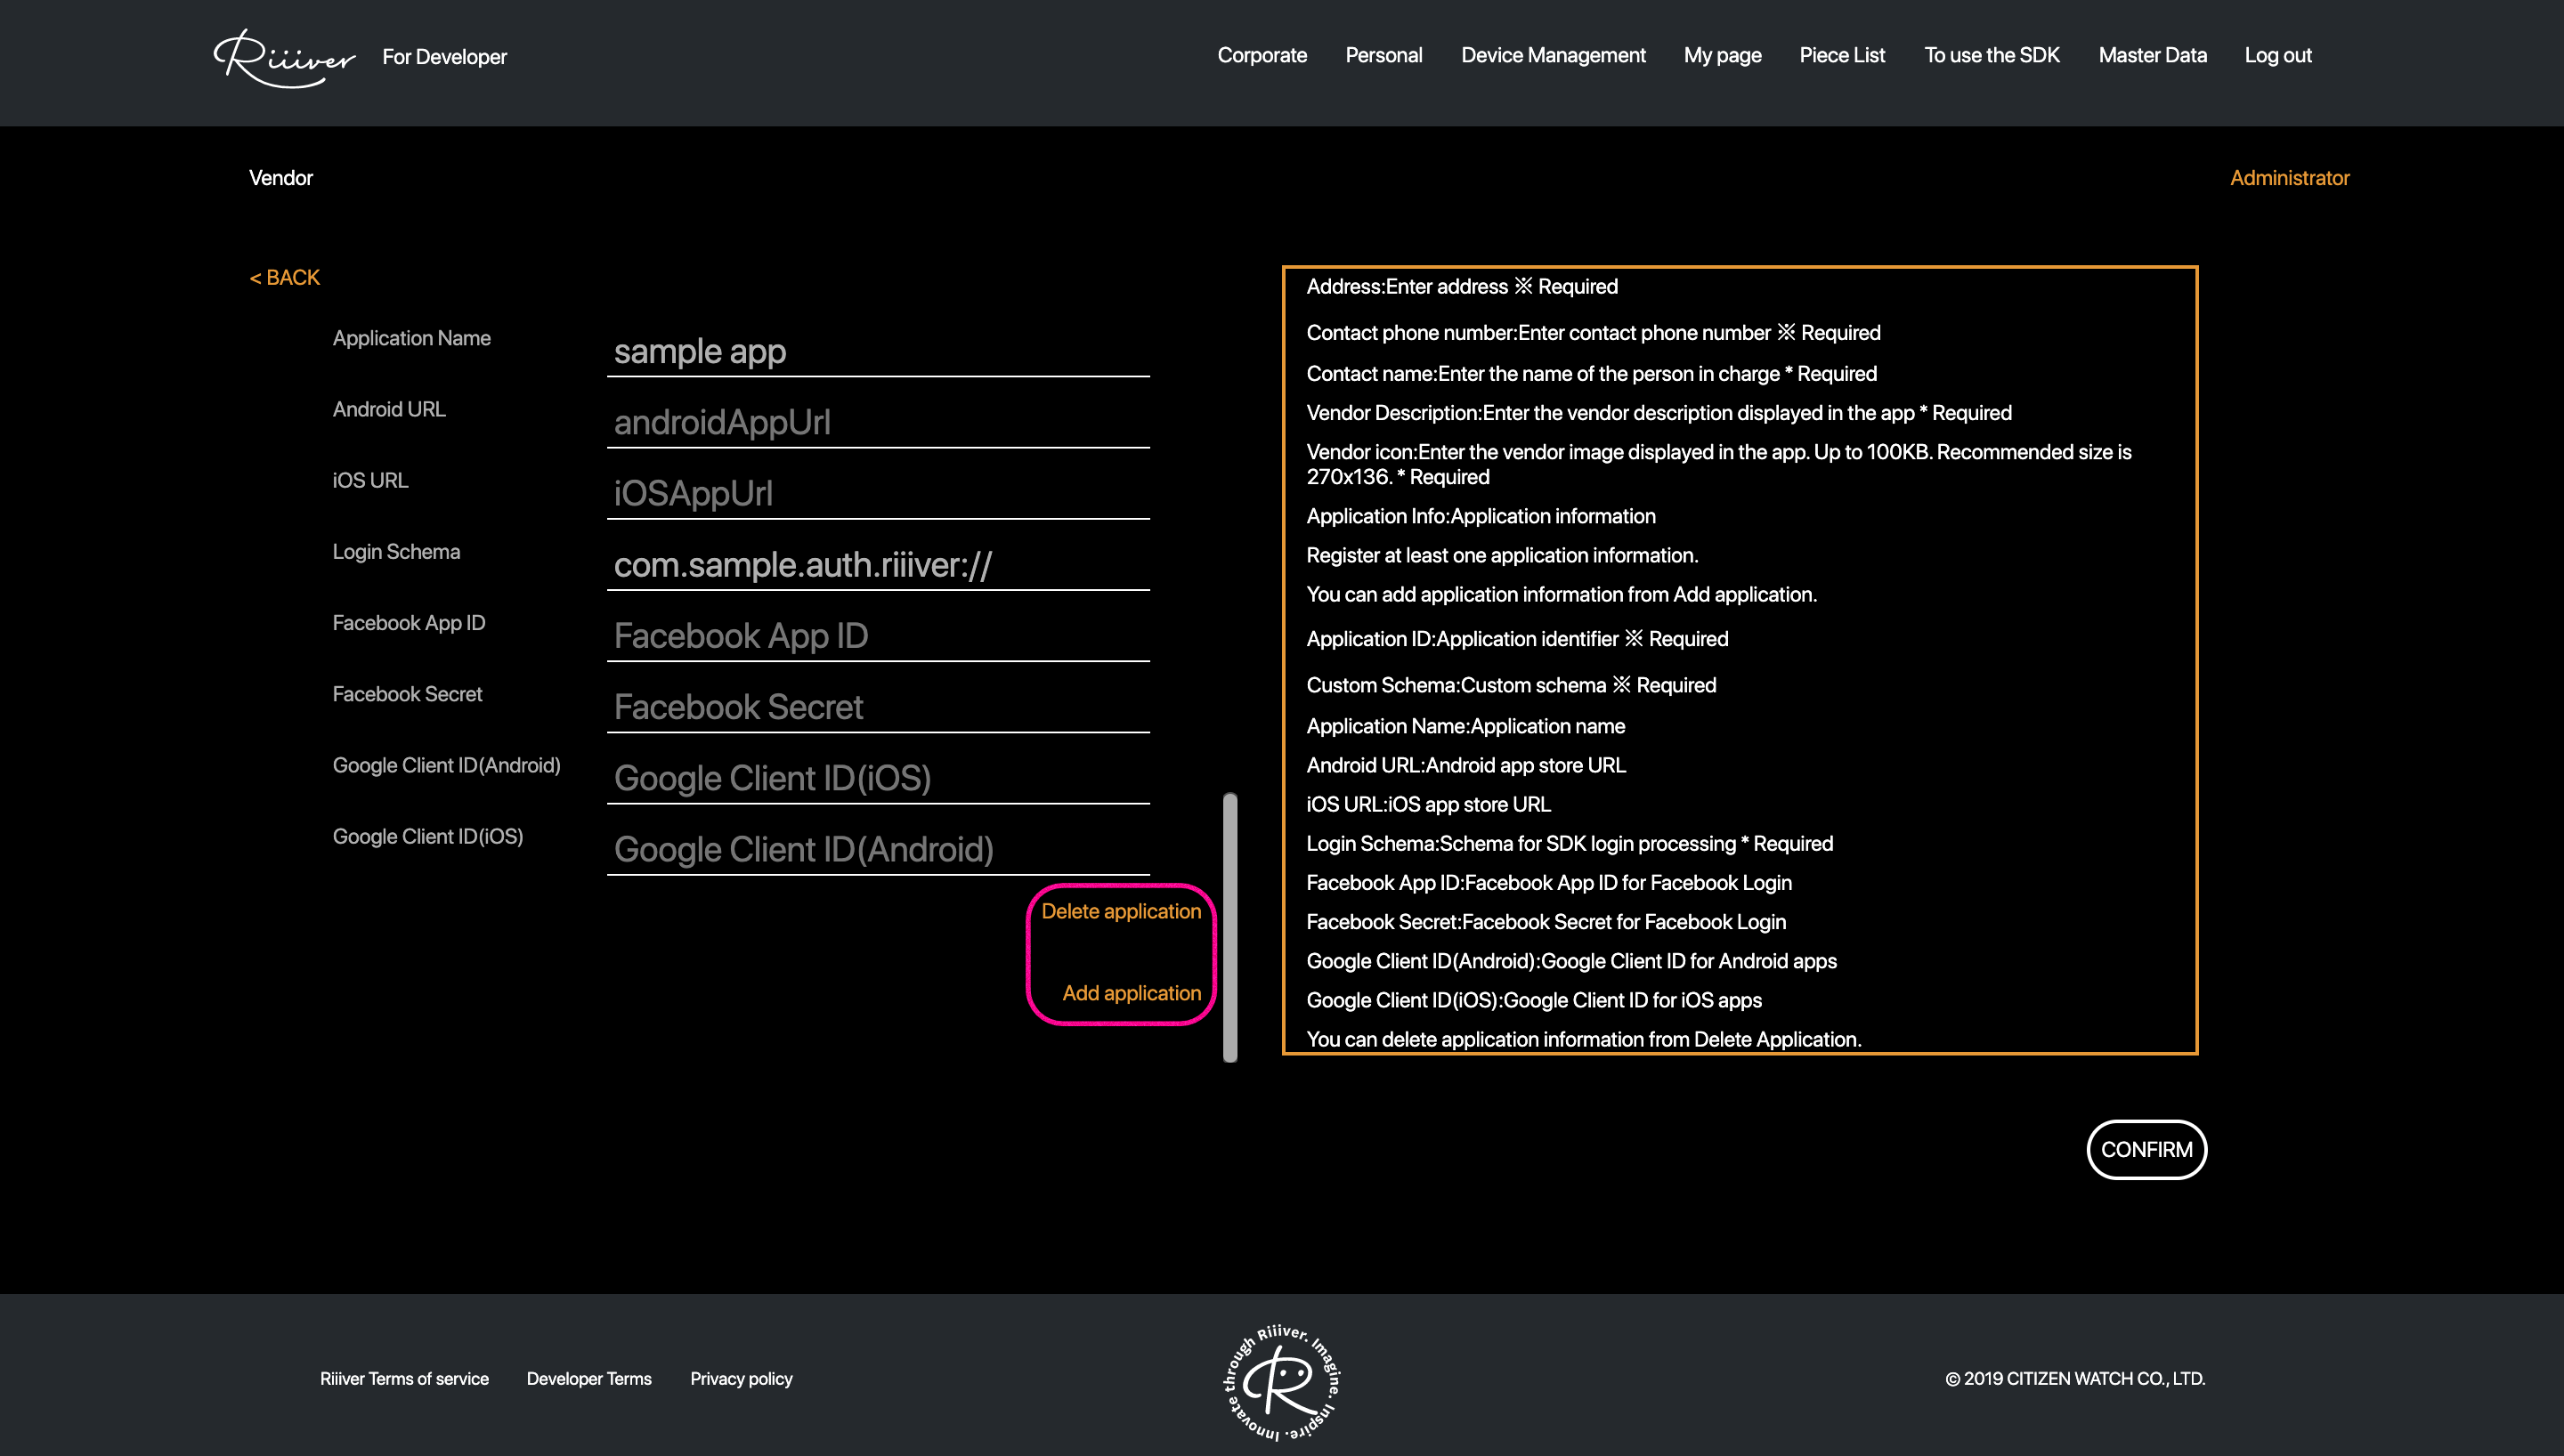
You can delete an application or register multiple applications by “Delete application” or “Add application” at the bottom.
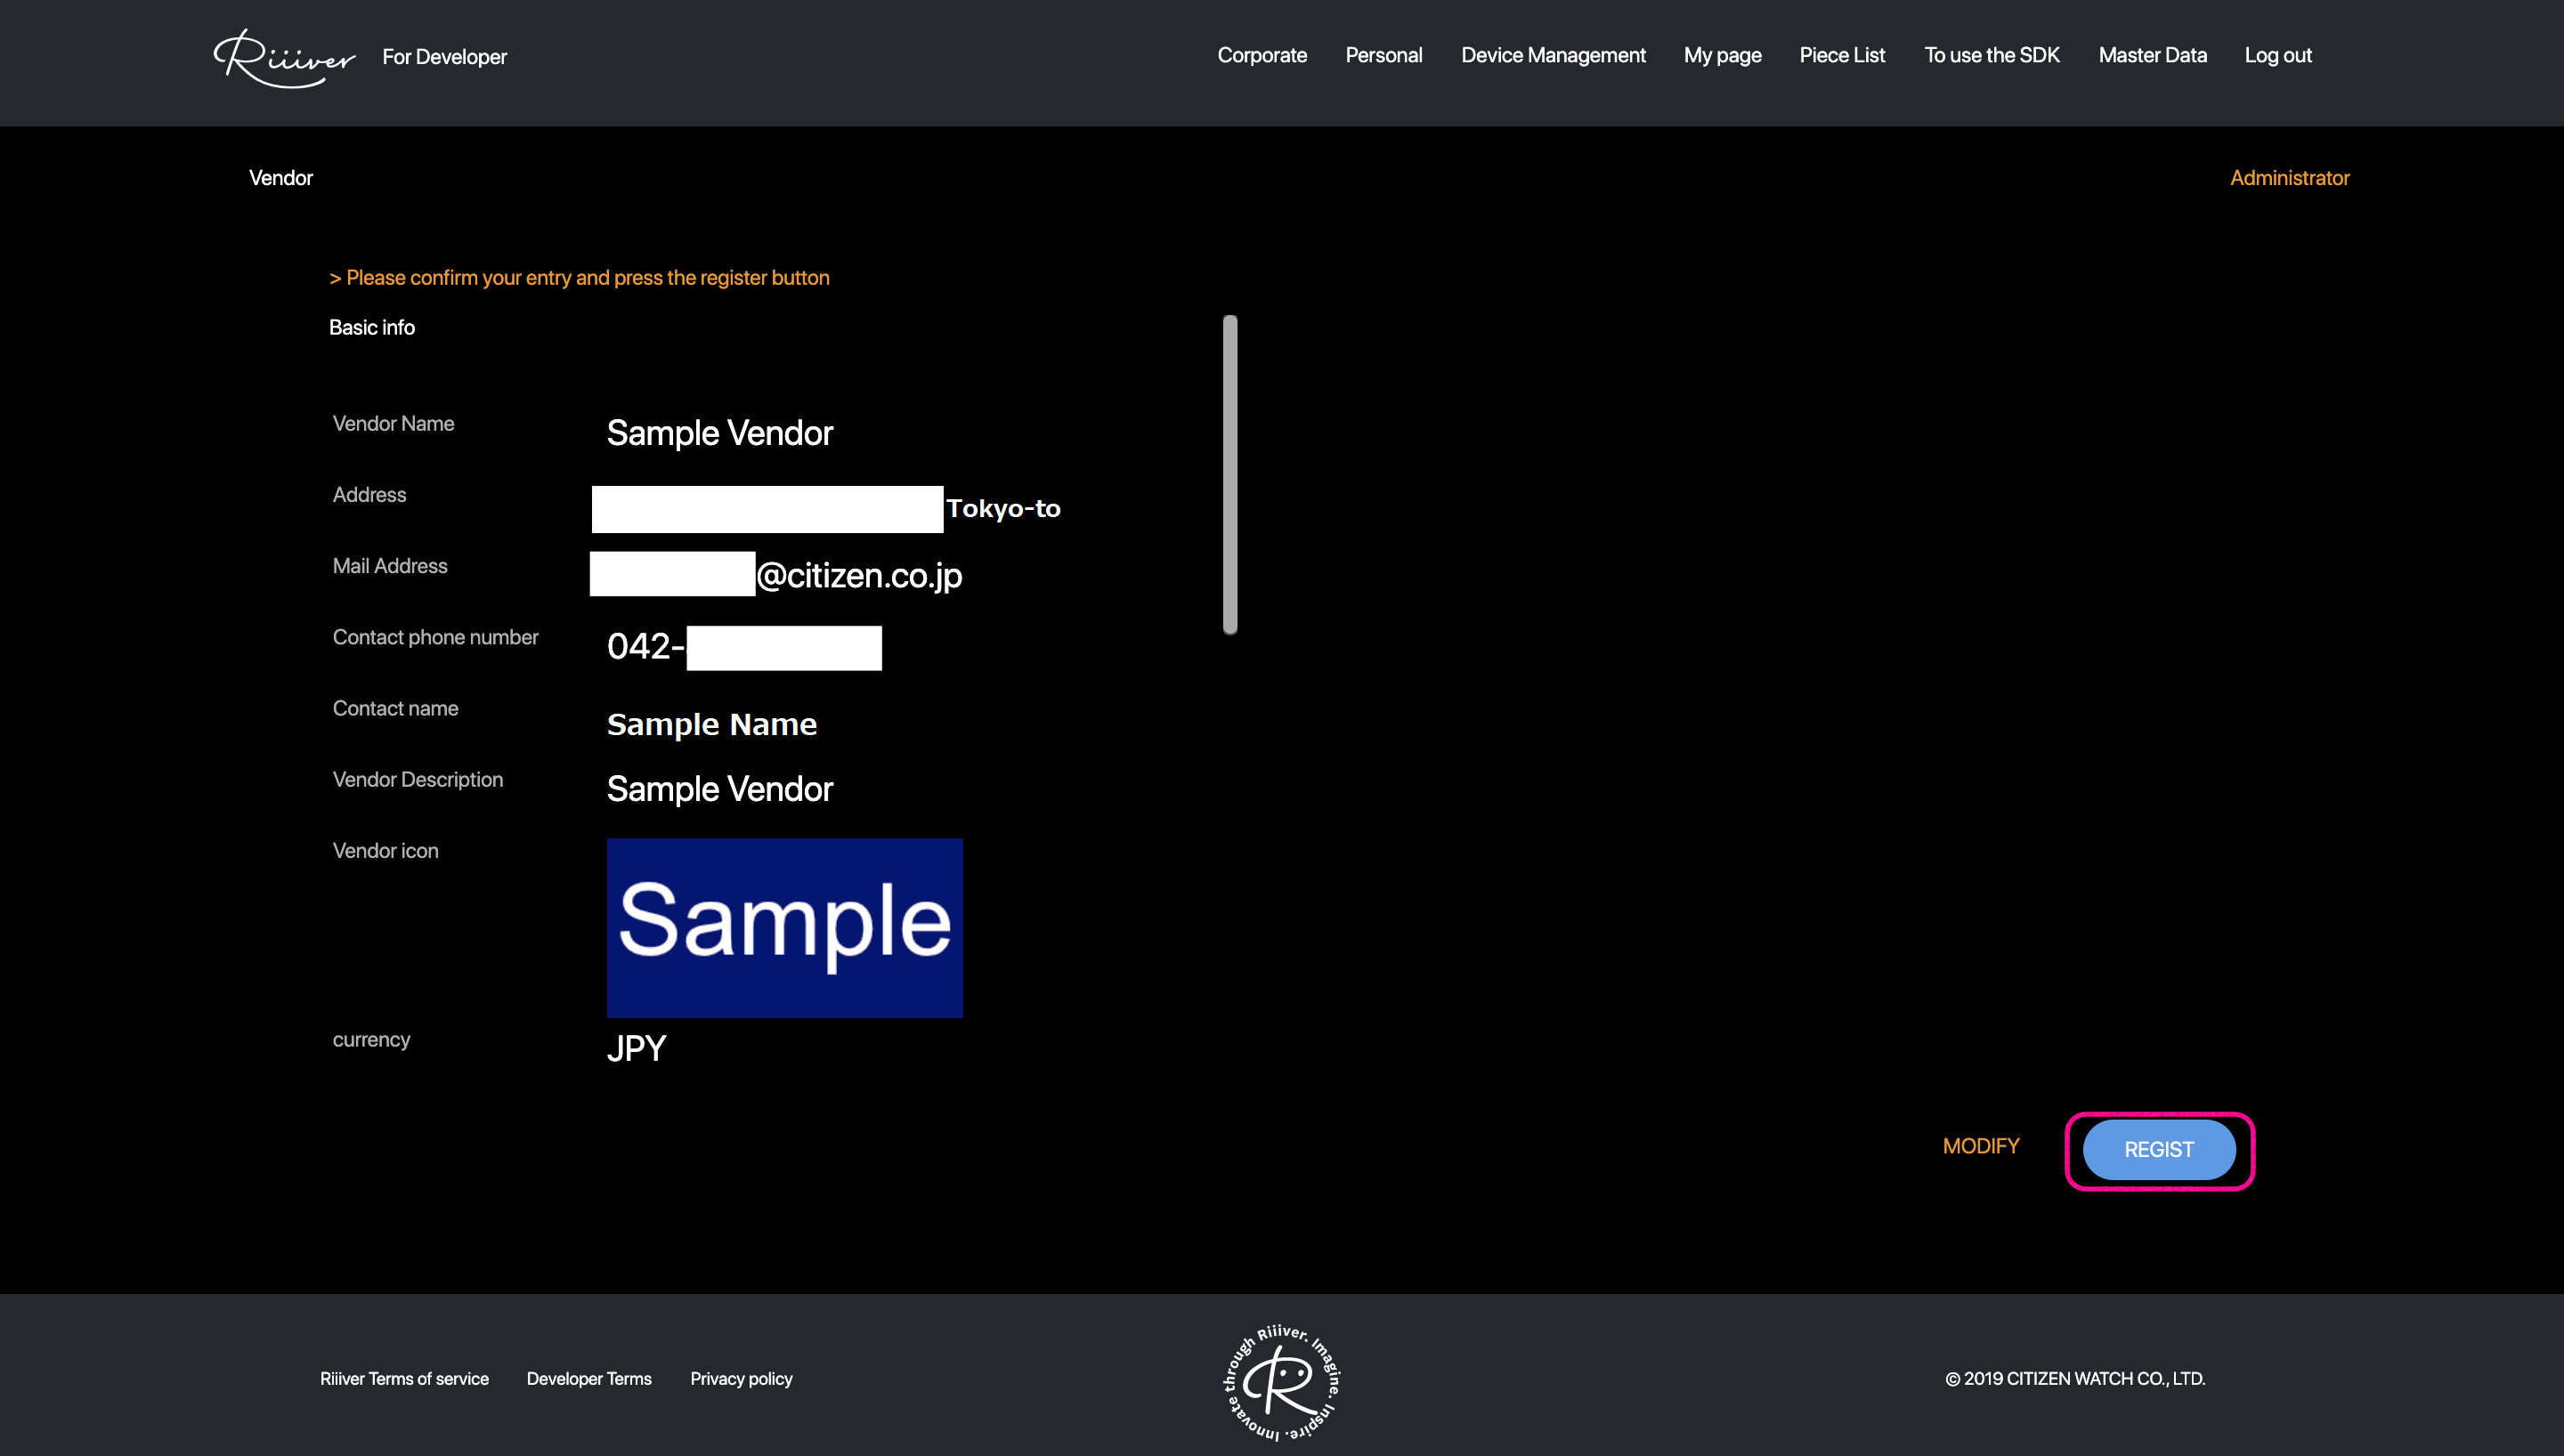
- After confirming the information that you have entered, click "REGIST" to complete the registration. If you need to modify the entry, click "MODIFY" to do so.
- Please click on the "Corporate Account Management" tab again.
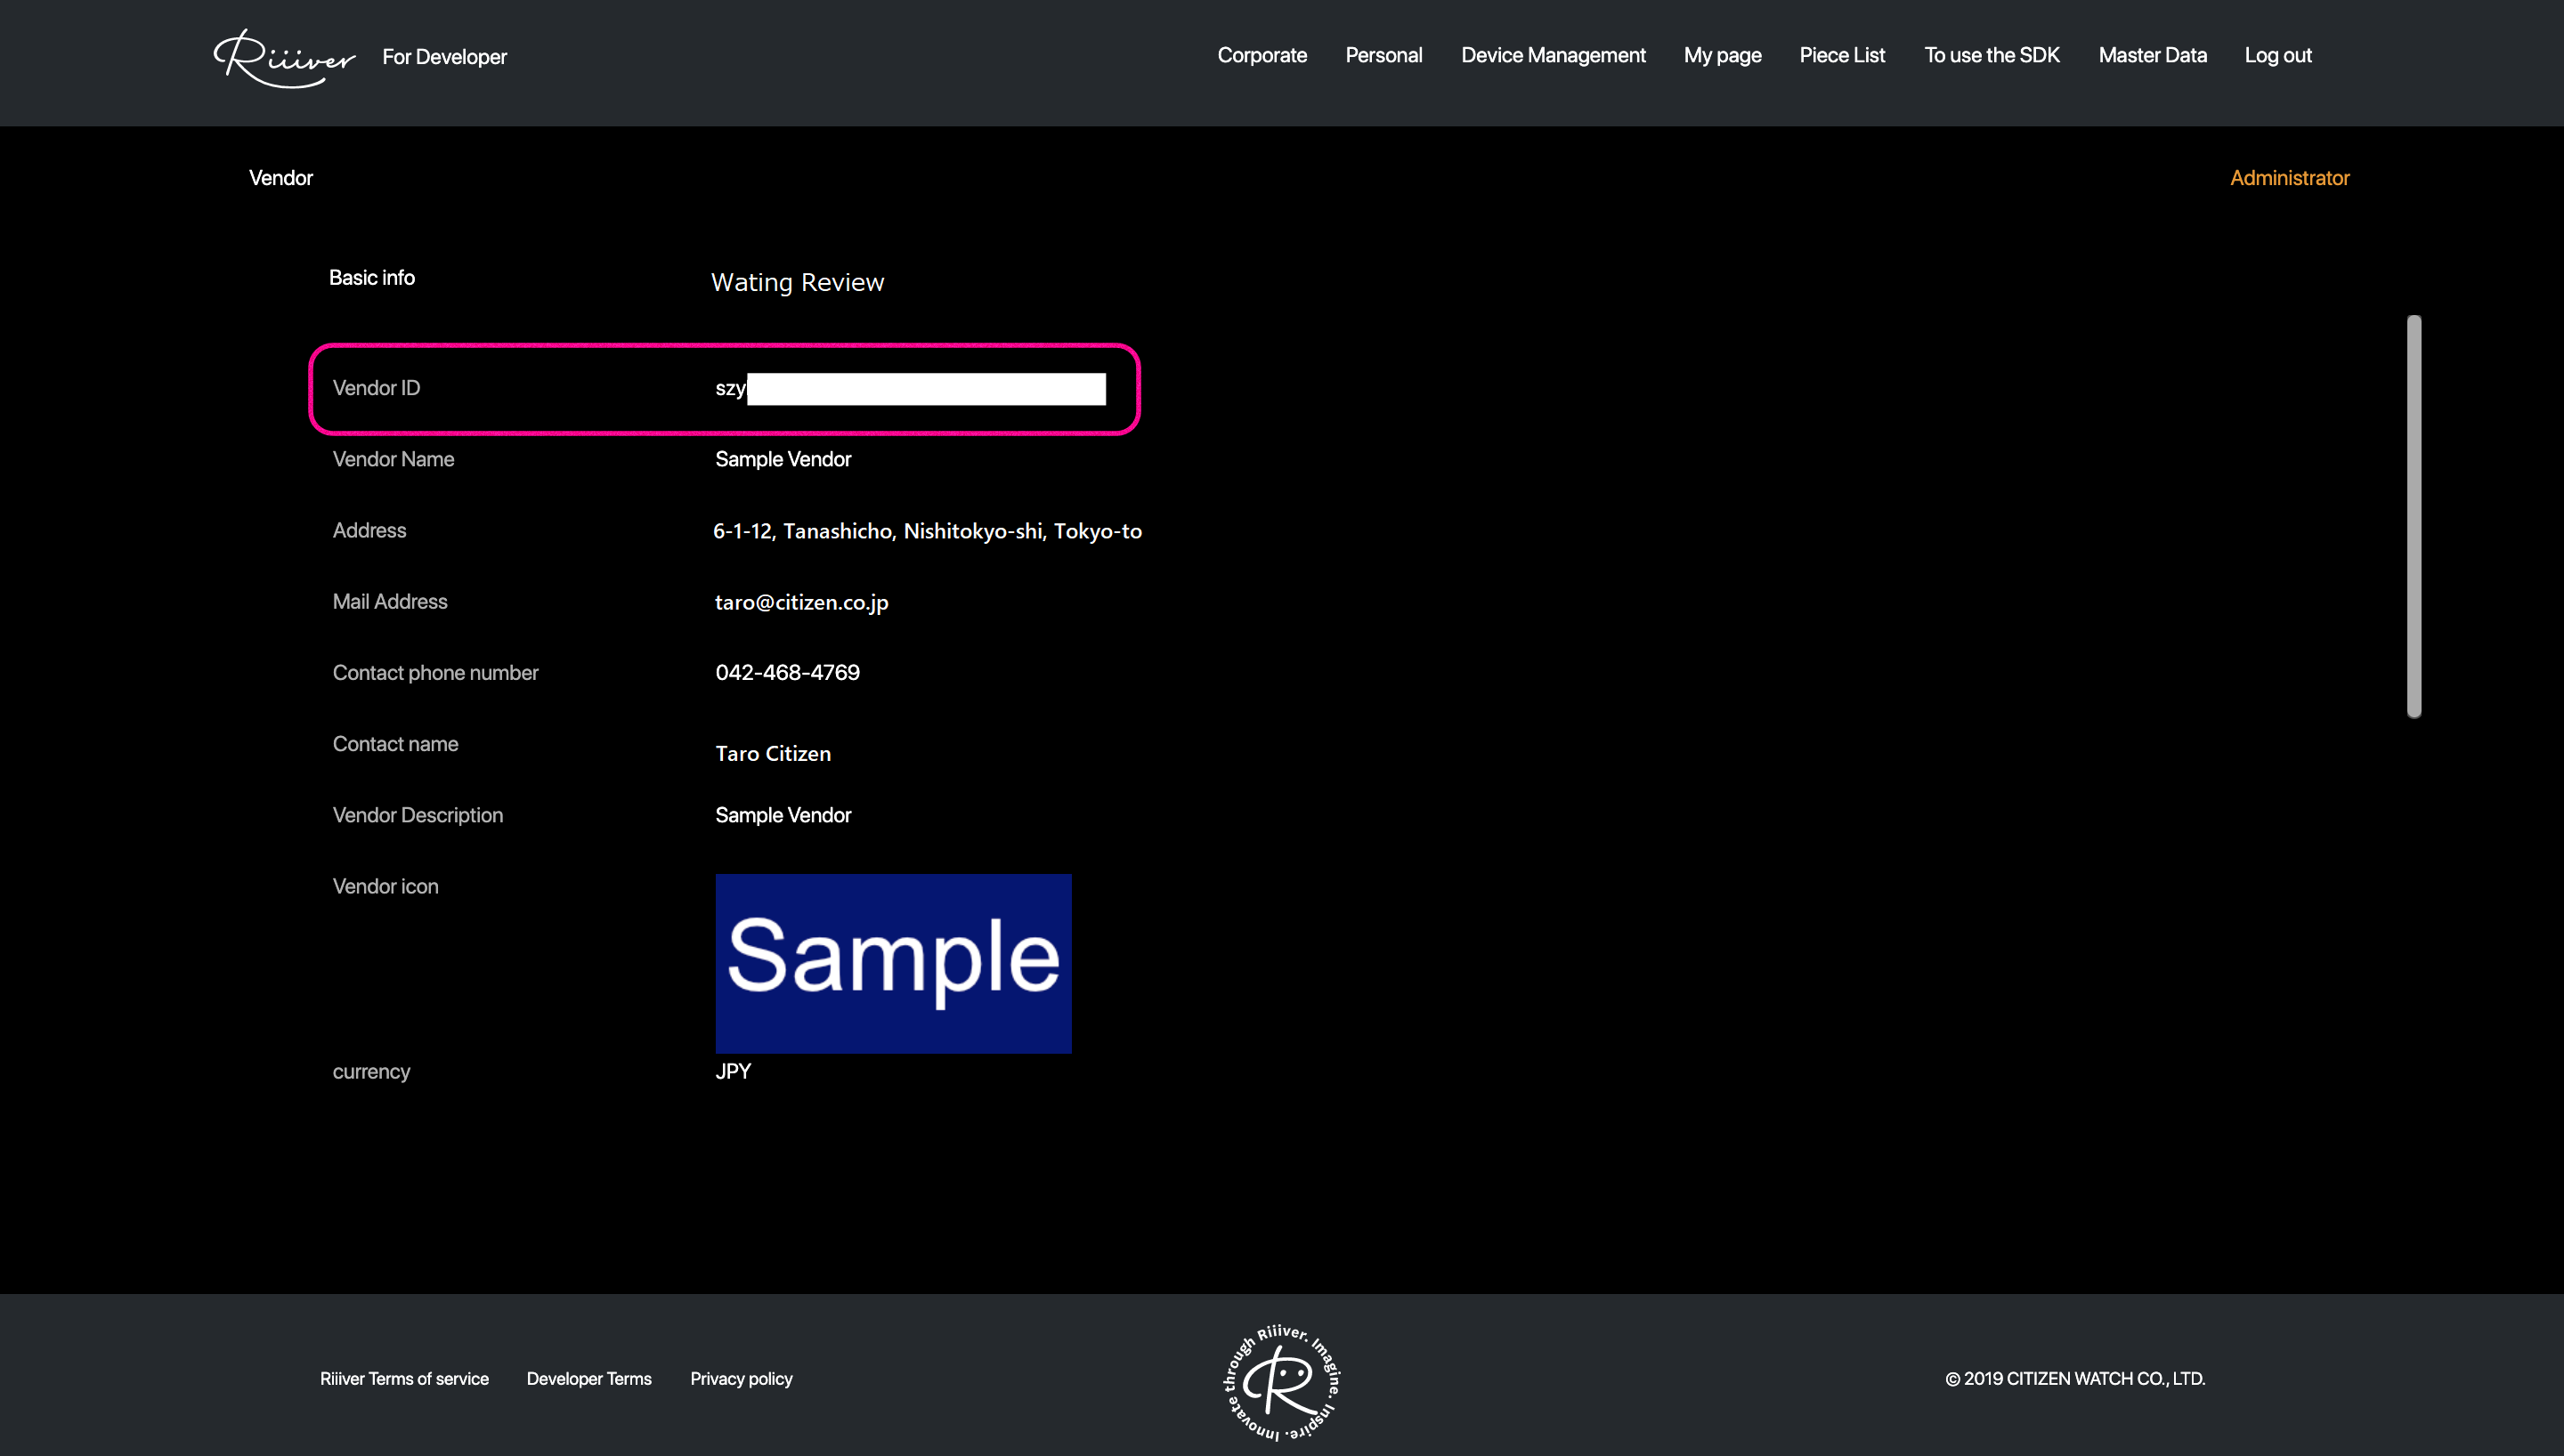
You can confirm the Vendor ID issued by the Riiiver system. This ID will be required when using the SDK. It will also be used in a sample project later. You can come back to this screen to confirm at that time.
This completes the registration of company information. Next, register your device information.
Register device information
What is a device to be registered in Riiiver? A device is an edge device that connects to Riiiver. Here are examples.

The diagram above shows an example of the topology of a Riiiver-enabled smartwatch connecting to Riiiver. The smartwatch in this example is configured to connect to Riiiver via a smartphone application. This is an example in which a user operates iiidea by manipulating the smartwatch, or the smartwatch outputs results when iiidea is operated.
In this example, the device corresponds to a smartwatch and the app corresponds to Your App on a smartphone. The app here refers to the application on the smartphone that hosts RiiiverSDK.
Here is another example.

The diagram above is an example of the topology in which Your App hosts RiiiverSDK and also executes iiidea. In cases like this, in which the application alone completes the process, both the app and the device correspond to Your App on the smartphone. As the app on the smartphone is like a device, it is called a "logical device".
The sample app you just built is also of this topology. In other words, the sample app executes iiidea on the sample app itself.
Now, register the sample app itself as a device in Riiiver in order to enable iiidea to run on the sample app.
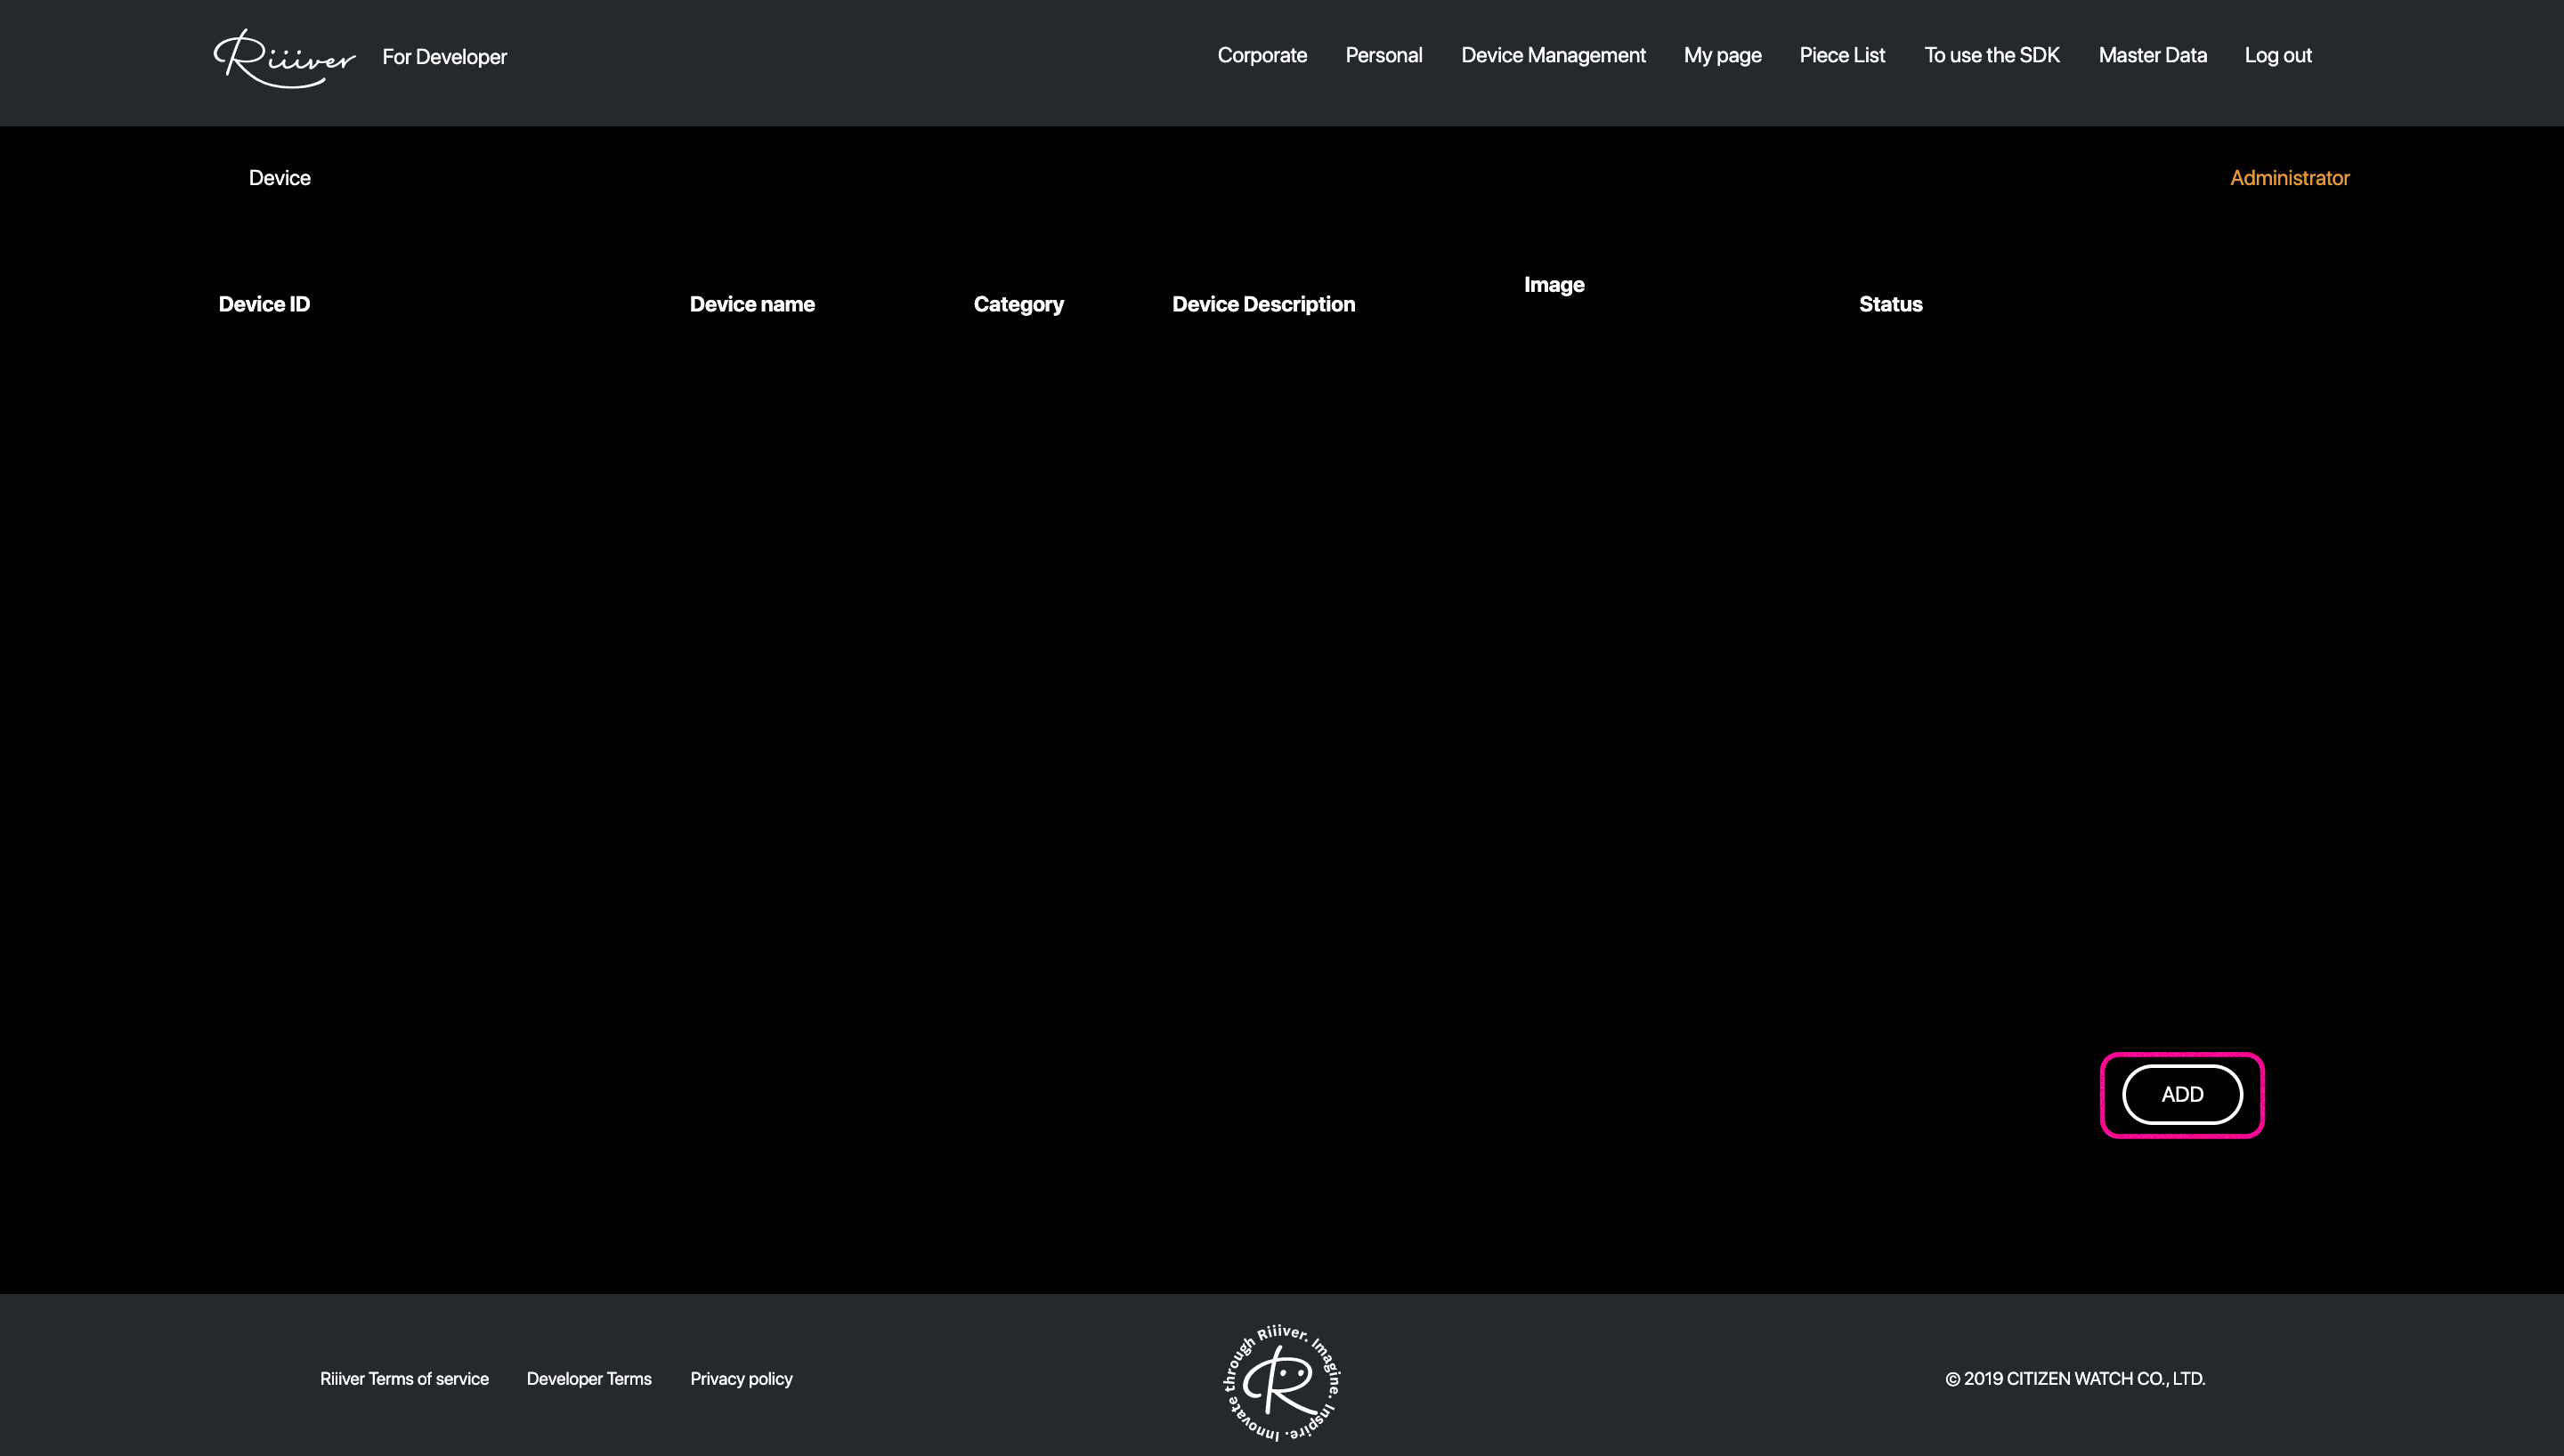
Click on the “Device Management” tab at the top of the developer site.

Click “ADD” at the bottom.
Enter the required information. At this time, be sure to check the test use checkbox on. When you have finished entering the information, click "Confirm" to continue.
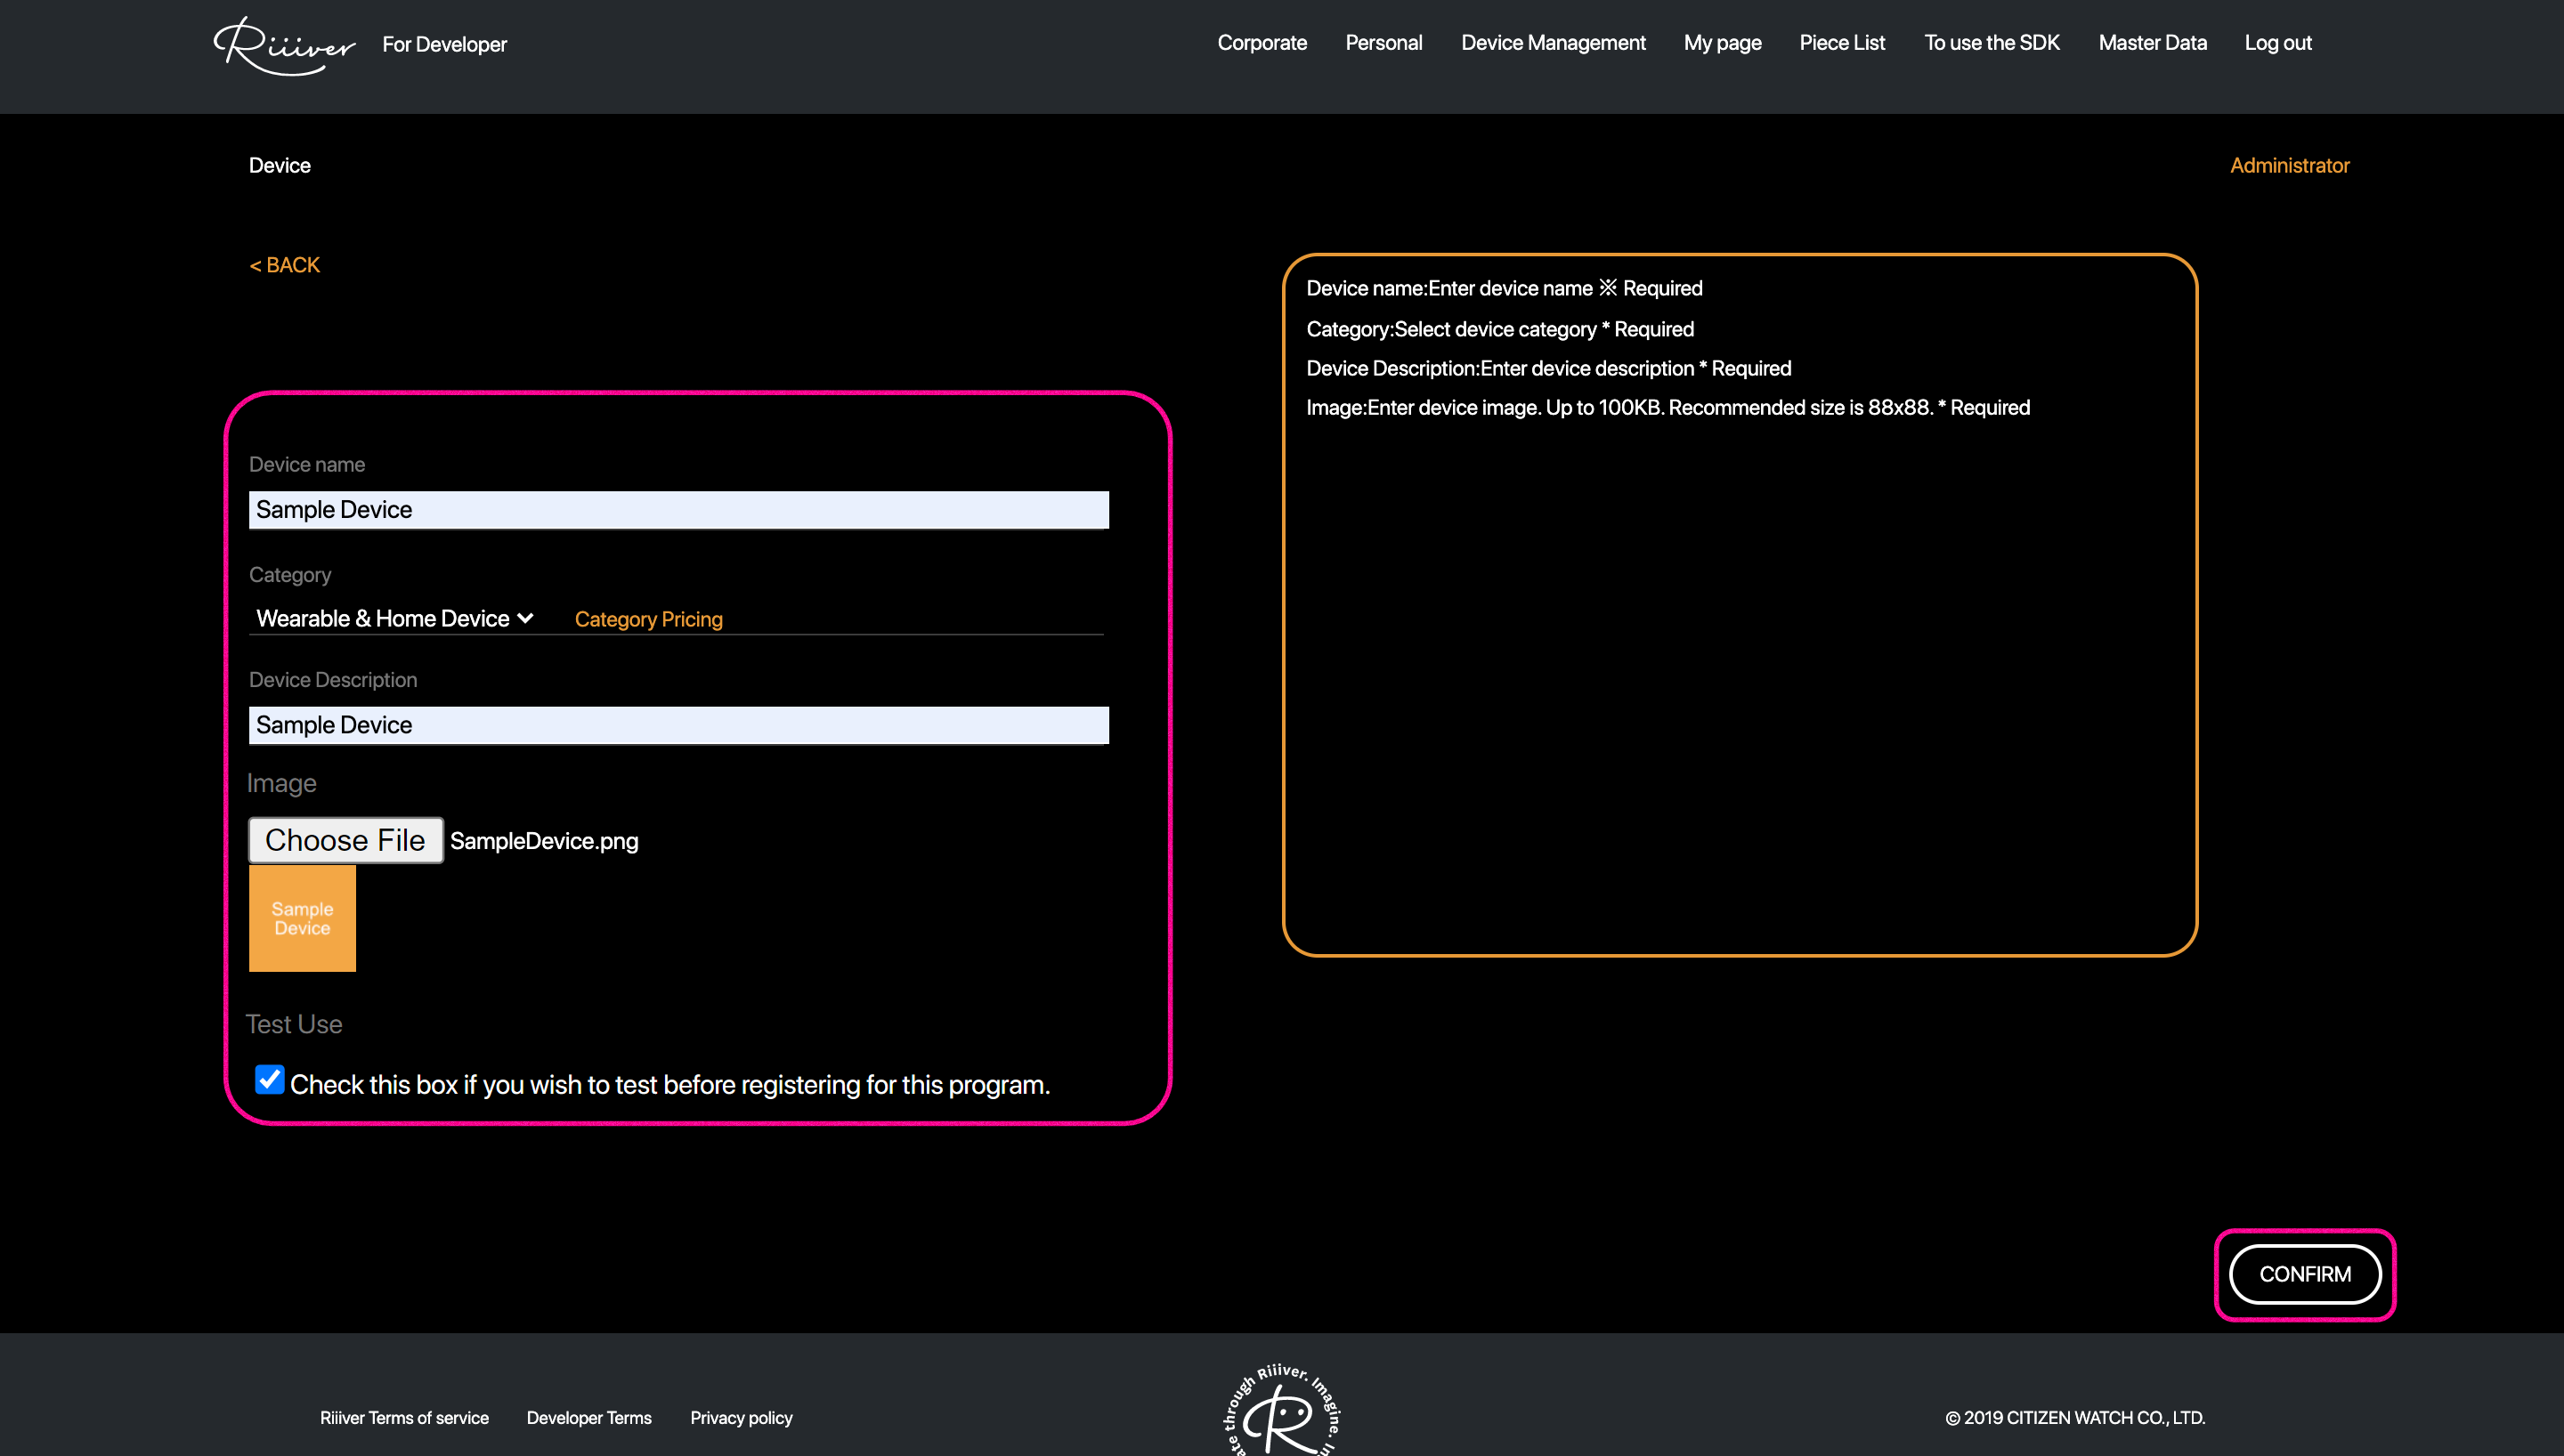
Device Name, Device Description, Device Image, and other information registered here will be displayed to help future iiidea developers determine which device the created iiidea will work with. Enter the description that is easy-to-understand.
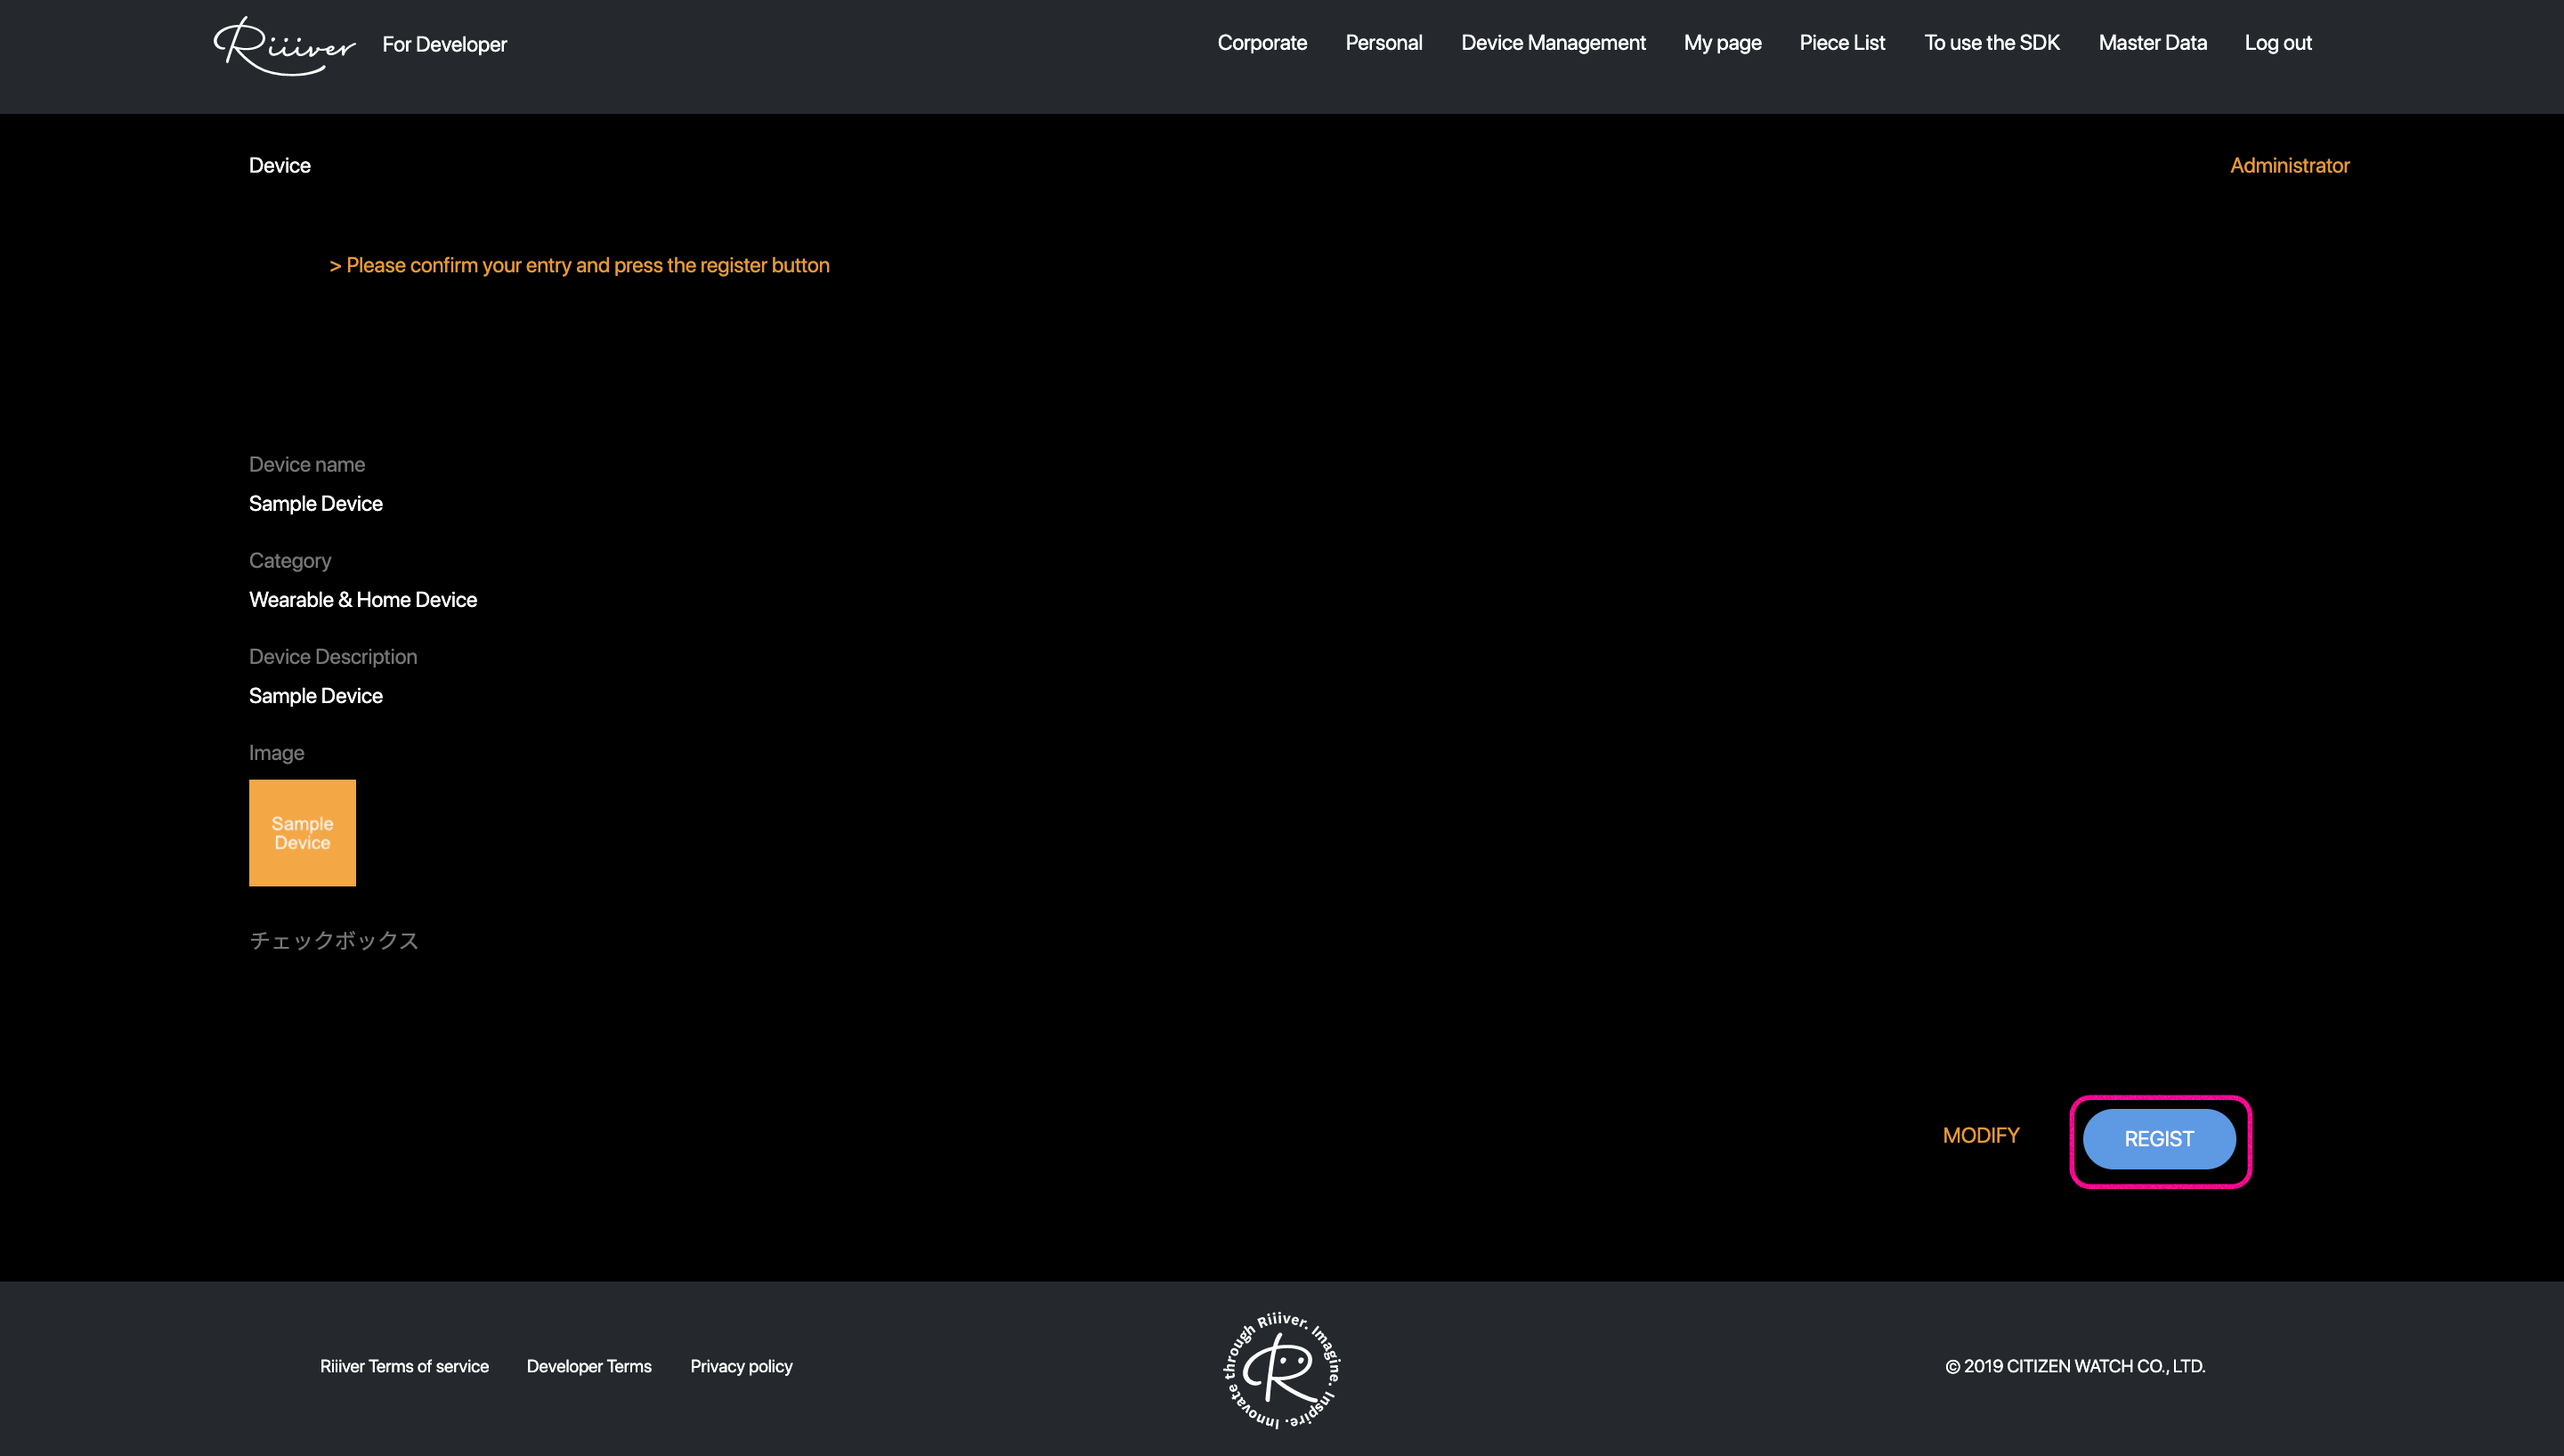
As for category, please select “App”. The app functions as a device in the sample app.If you are satisfied with the information you have entered, click "REGIST" to complete the registration. If you need to modify the information, click "MODIFY" to do so.
Click on the "Device Management" tab again and make sure the registered device information is displayed.
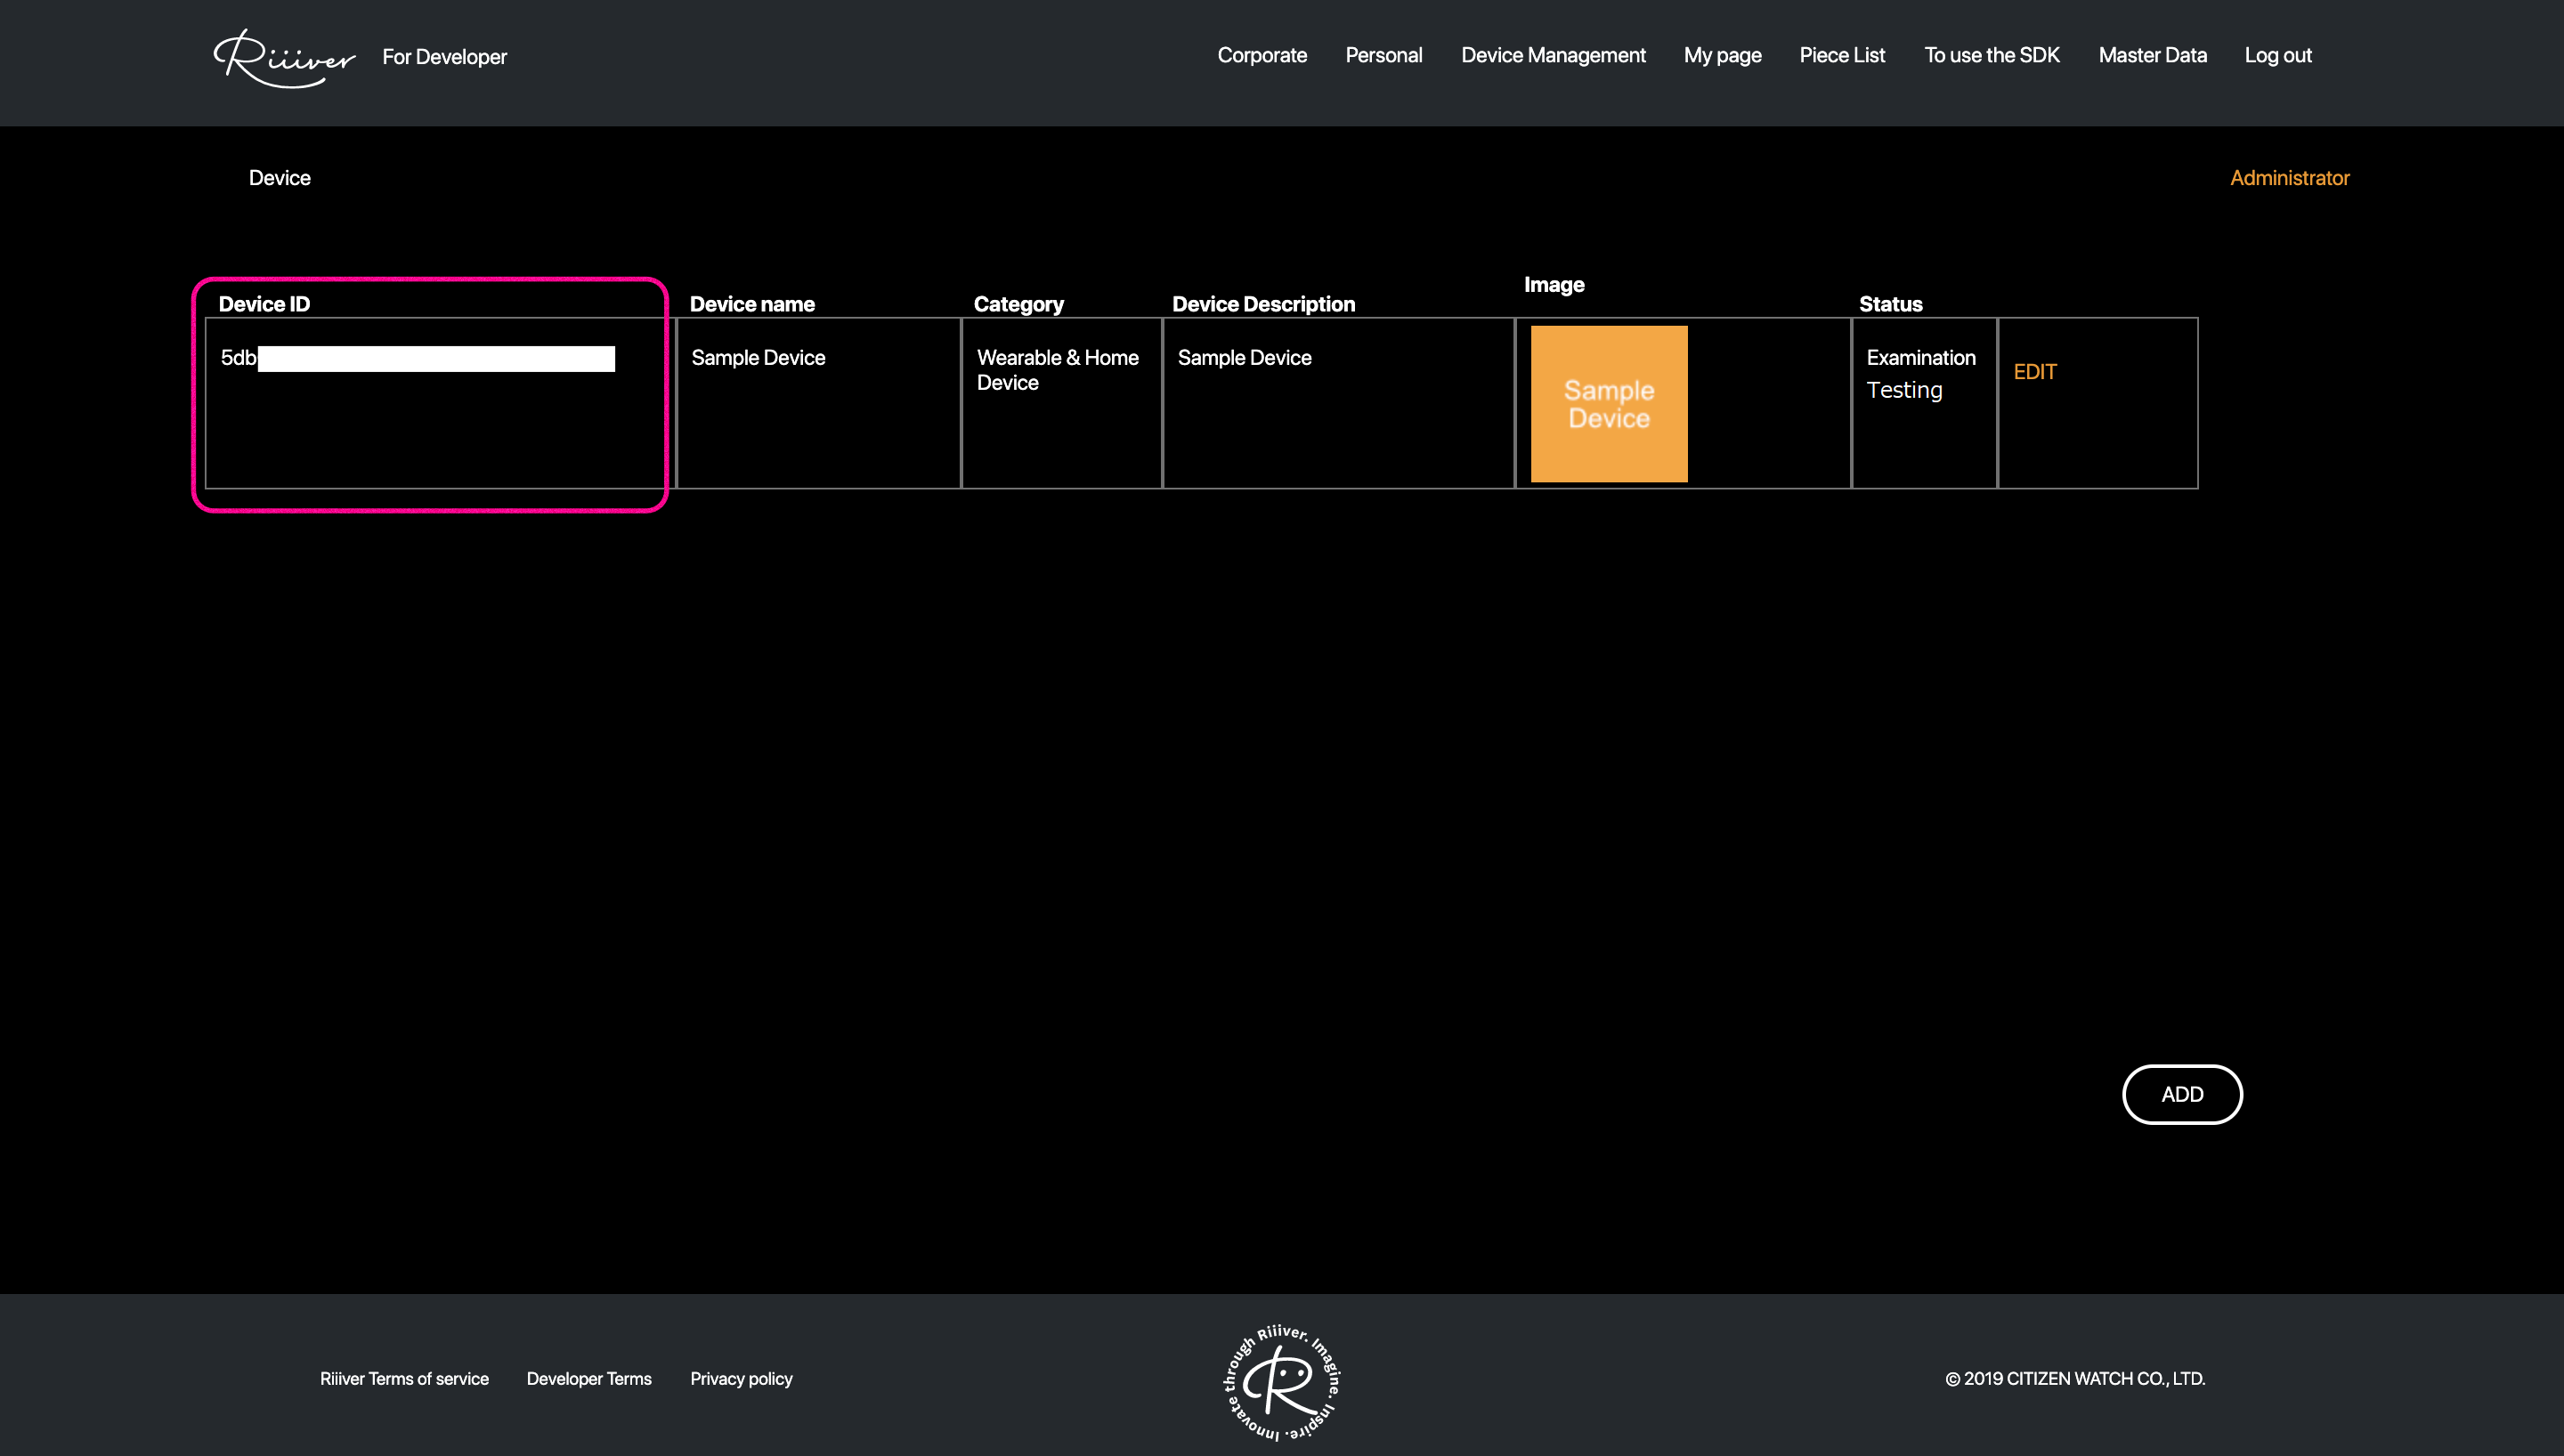
You can confirm the Device ID issued by the Riiiver system for the device you registered. This Device ID is the information required when connecting the sample app to Riiiver. (You can come back to this screen to confirm the Device ID at that time!)
Thank you for the effort. This completes the registration of the required information on the Riiiver side. The next step is to link the sample app with the information you just registered.
Link the registered information to application
By reflecting the information that you have just registered in Riiiver into the sample app as well, you can now link your information to the sample app.
For iOS, open the sample.xcworkspace file.
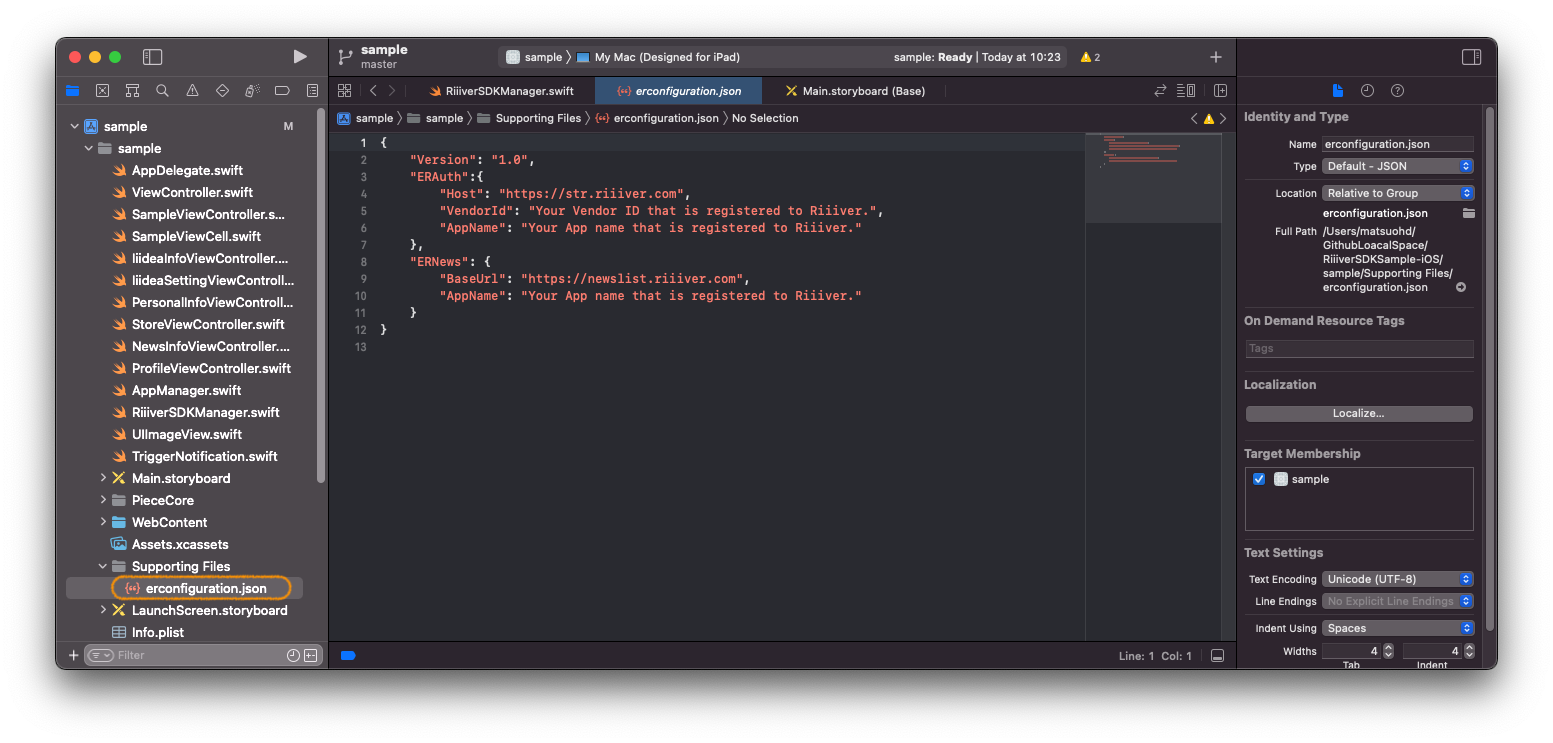
Find a file named erconfiguration.json in the Supporting Files section in the project.
For Android, open the app file. Find erconfiguration.json in the res/raw folder.
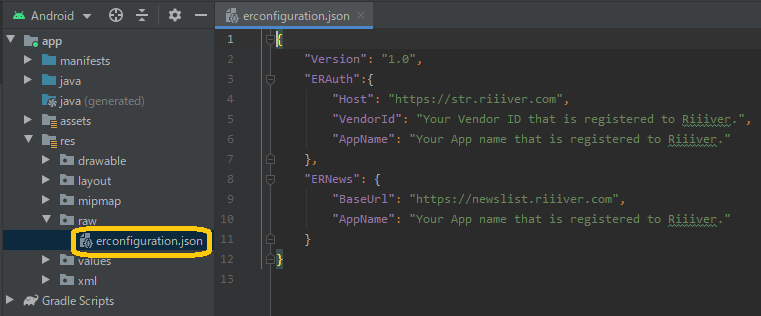
Here, you set up the information required for user authentication and connection to Riiiver. Open this file. You should see descriptions like the following.
{
    "Version": "1.0",
    "ERAuth":{
        "Host": "https://str.riiiver.com",
        "VendorId": "Your Vendor ID that is registered to Riiiver.",
        "AppName": "Your App name that is registered to Riiiver."
    },
    "ERNews": {
        "BaseUrl": "https://newslist.riiiver.com",
        "AppName": "Your App name that is registered to Riiiver."
    }
}
This document only sets up the minimum necessary to make the sample app work. Here, replace the values corresponding to the following two keys with the ones you have registered. (inside "ERAuth")
- "VendorId": Paste here the VendorID issued in the Corporate Account Registration.
- "AppName": Paste here the Application Name. (Not the Application ID!)
To use the notification function, please also include the "AppName" in "ERNews".
If you would like to submit an actual notice, please contact us through the Riiiver Inquiry.
There is one more file to set up.
Open AppManager.swift for iOS, or RiiiverSDKConfig.kt for Android, in the sample app.
There should be a function like the following.
func getDeviceId() -> [String] {
    return ["Your Device ID Here!"]
}
const val deviceId = "Your Device ID Here!"
fun getDeviceIdList(): List<String> {
return listOf(deviceId)
}
Please replace the string "Your Device ID Here!" with the Device ID issued in the device registration.
Set the URL Scheme
Next, set the URL Scheme. Use the value set as Login Scheme in the company information registration. When logging into the Riiiver environment, RiiiverSDK uses an external browser to perform the login process, rather than WebView in the application. The URL Scheme is set so that the transition from the external browser back to your application is made when the login is finished.
For Android, find a file named AndroidManifest.xml under manifests.
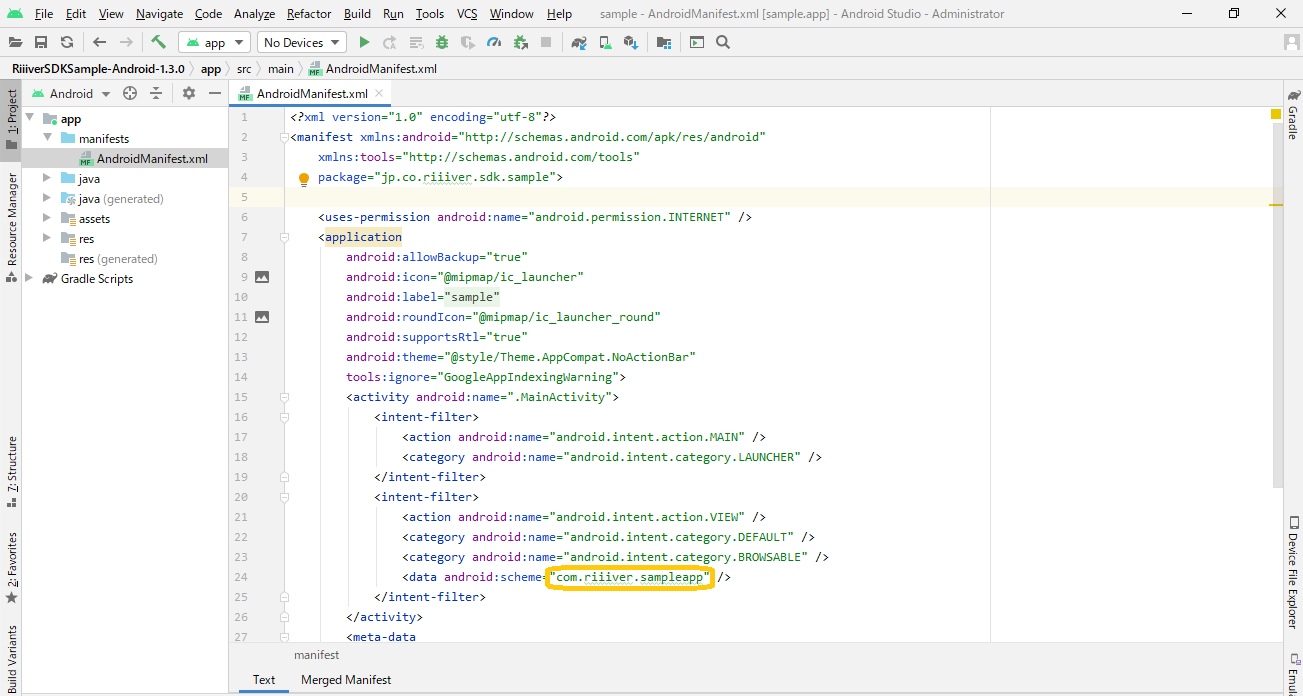
For data android:scheme, specify the Login Scheme you entered during registration.
For iOS, enter the value of the Login Scheme in the URL Type under the “Info” tab of the project.
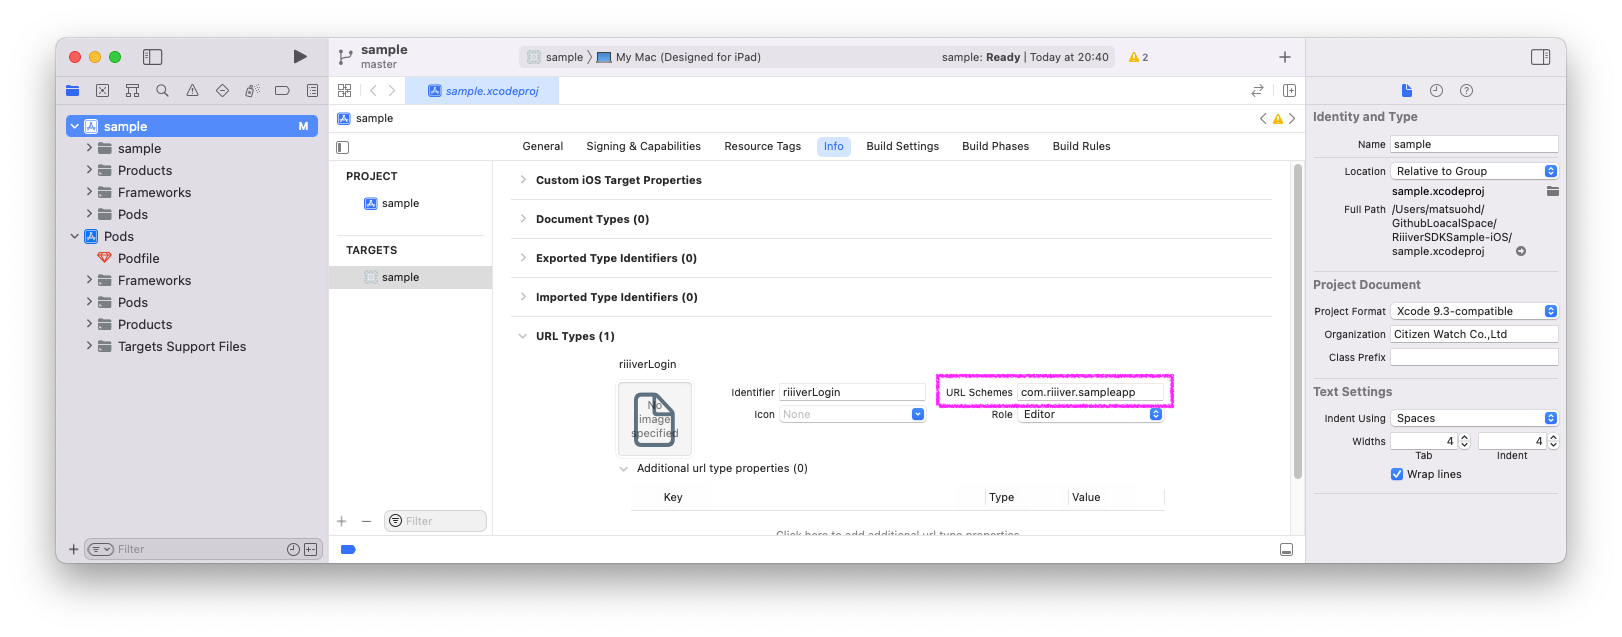
Specify Custom Scheme as necessary. (Not necessary for the sample app at this time.)
This completes the process of reflecting the registration information in the sample app. After saving and building, connect an iPhone to a Mac and actually run debugging. You should see the login screen for Riiiver!
Now move on to the next chapter, "Understanding iiidea displays and device associations in the iiidea Store".